Authentication > Integrate Okta SSO
Tallyfy integrates with Okta through SAML 2.0 SSO that you set up yourself. Create an Okta SAML…
Let your team sign into Tallyfy with their OneLogin credentials using SAML-based Single Sign-On (SSO). The setup takes about 30 minutes.
This diagram shows the OneLogin-Tallyfy SAML setup and authentication flow.
Sign in to your OneLogin portal
Open the Administration menu
Go to Applications > Applications
Click Add App

Search for “SAML Custom Connector” (or “SAML Test Connector” in older OneLogin versions)
Select SAML Custom Connector (Advanced)
Set the Display Name to “Tallyfy”
Click Save
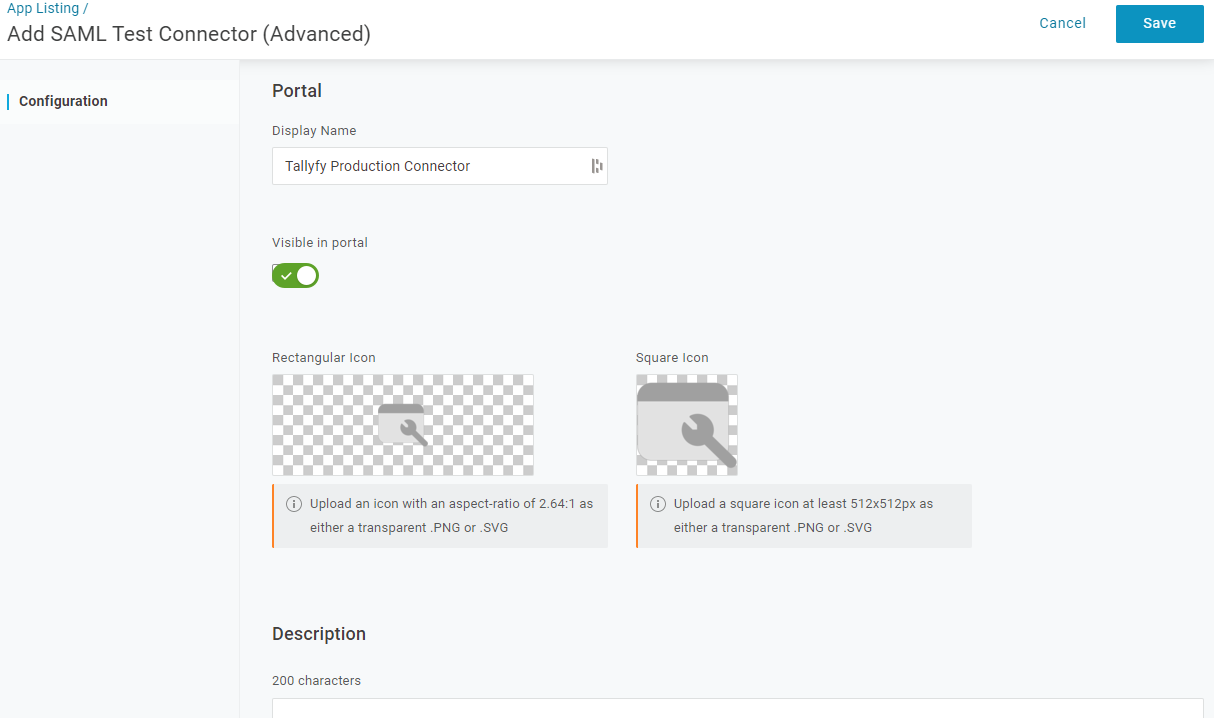
You’ll need Tallyfy’s SAML values to configure OneLogin:
In Tallyfy, go to Settings > Organization > Security > SSO
Start a new connection and pick OneLogin as the provider
Copy the SP ACS URL and SP Entity ID shown on the first step of the wizard


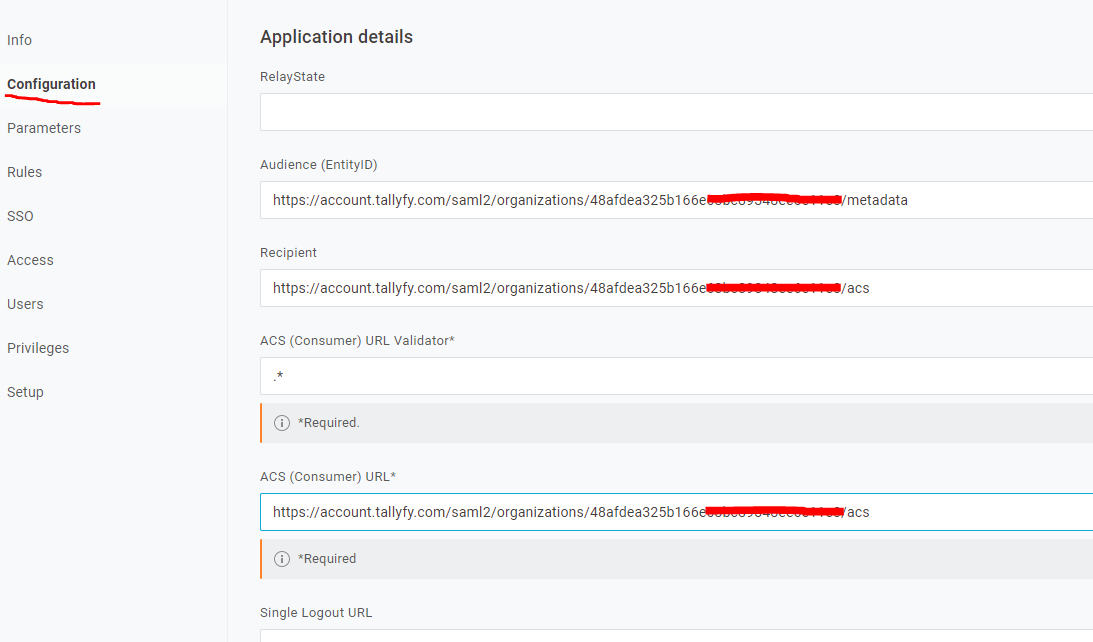
Go to the Configuration tab in your OneLogin application connector
Enter the Tallyfy SP ACS URL into the ACS (Consumer) URL field
Enter the same URL into the Recipient field
Enter the Tallyfy SP Entity ID into the Audience (EntityID) field
Enter the ACS URL again into the ACS (Consumer) URL Validator field
Click Save
Add these three parameters and check Include in SAML assertion for each:
| Parameter Name | Value |
|---|---|
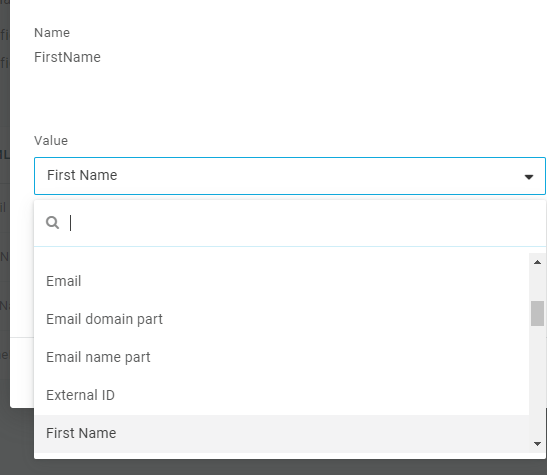
| FirstName | First Name |
| LastName | Last Name |
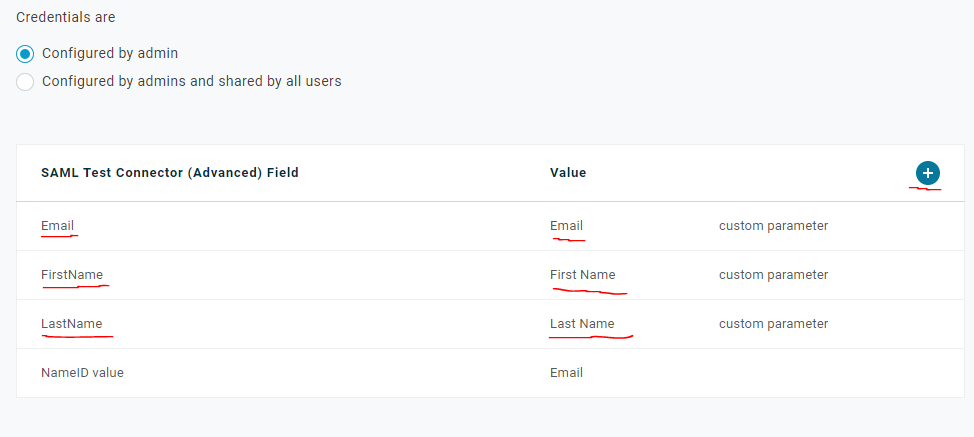
To add each parameter:
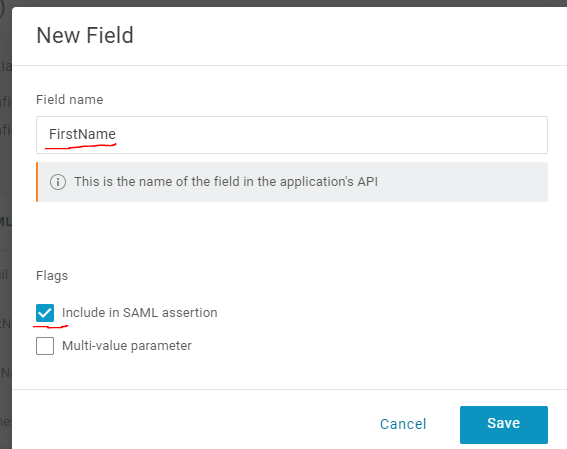
Click the + button in the top-right corner of the parameters table
Enter the parameter name (e.g., “Email”) and map it to the matching user attribute
Check Include in SAML assertion
Click Save
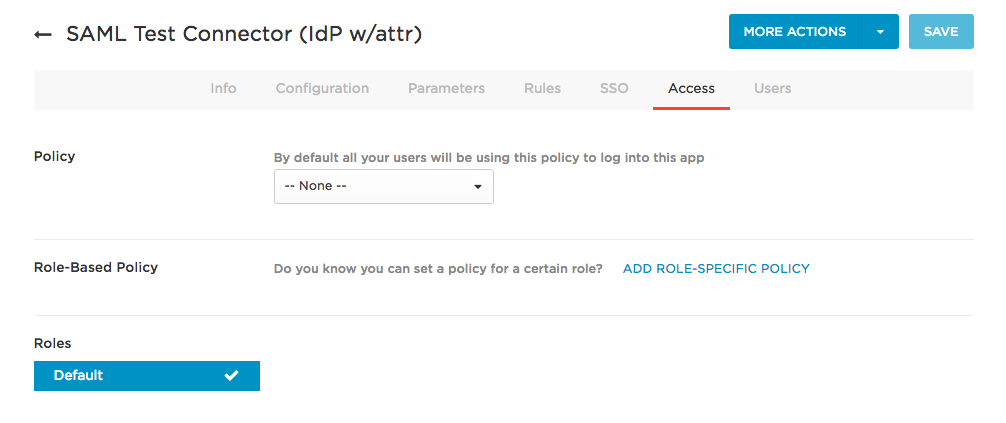
Go to the Access tab in your OneLogin application
Select the appropriate roles or users
In this example, we’re using the Default role
Click Save
OneLogin can hand you a metadata link, which is the easiest thing to paste into Tallyfy.
Go to the SSO tab in your OneLogin application
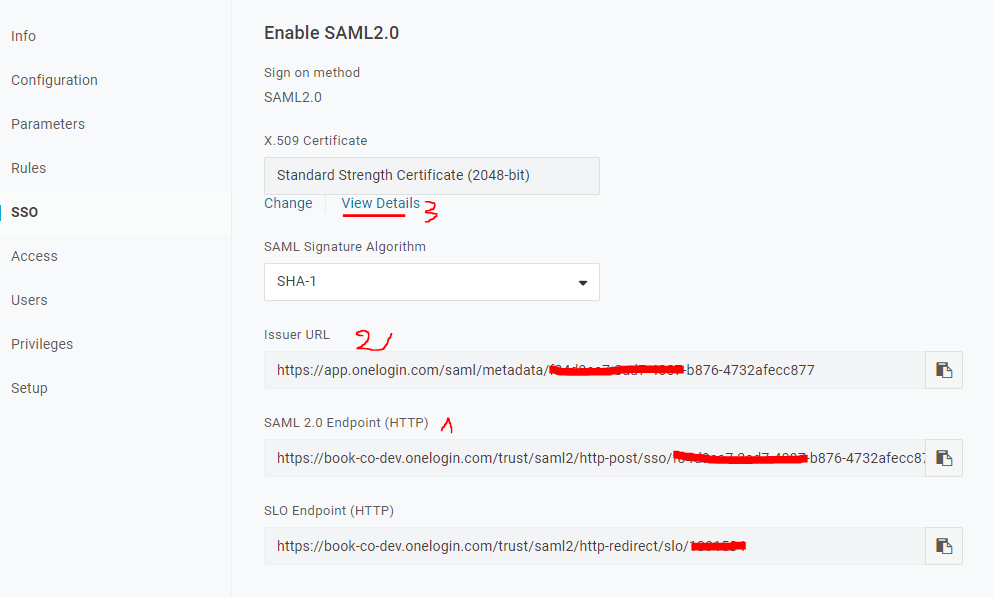
Copy the Issuer URL value. OneLogin’s metadata URL is usually the issuer with /metadata on the end.
If you’d rather enter values by hand, note the SAML 2.0 Endpoint (HTTP), the Issuer URL, and the X.509 Certificate.
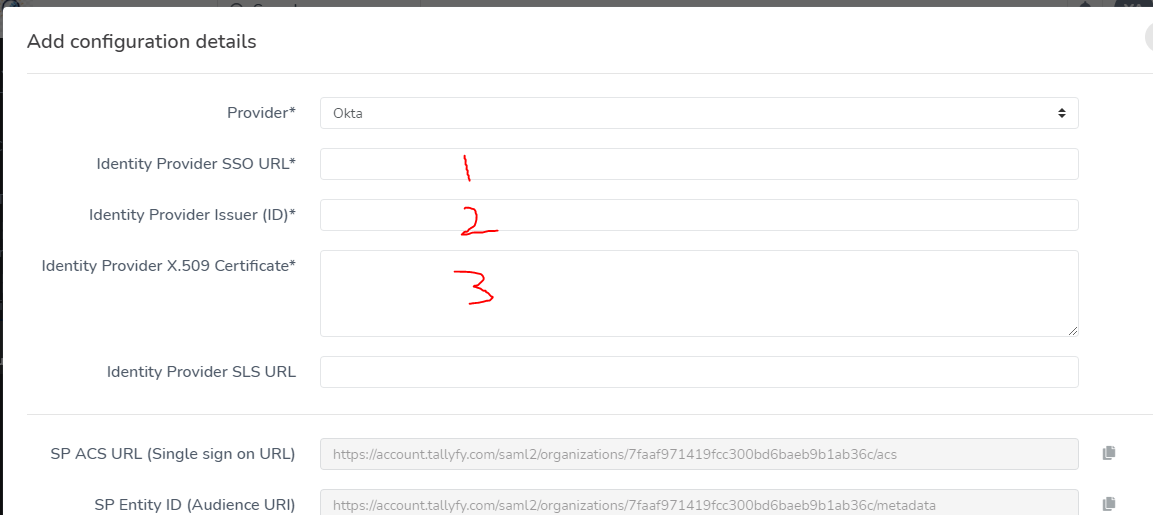
Back in the Tallyfy SSO wizard (Settings > Organization > Security > SSO), move to the Enter IdP details step:
Metadata URL - paste OneLogin’s metadata link. Tallyfy fetches and parses it. Easiest option.
Manual entry - enter the SAML 2.0 Endpoint (HTTP), the Issuer URL, and the X.509 Certificate instead.
Run the Test connection step and fix anything it flags.
Once the test passes, enable the connection.
After completing the setup:
Get your org’s SSO login URL from the SSO wizard (it’s shown next to the connection)
Share this URL with team members who have access to the OneLogin application

When users access Tallyfy through this URL:
Running into auth issues? Check these common culprits:
SAML signs people in. SCIM keeps your roster in sync. With OneLogin provisioning on, OneLogin pushes user adds and removals to Tallyfy automatically, so accounts track your directory and you stop paying for people who’ve left.
To map OneLogin roles to Tallyfy roles, provision groups whose names match Tallyfy’s reserved group names (for example tallyfy-admins). Full details are in SCIM provisioning.
Authentication > Integrate Okta SSO
Integrations > Authentication and SSO
Authentication > Integrate Microsoft Entra ID SSO
Authentication > Integrate JumpCloud SSO