Integrations > Authentication and SSO
Tallyfy offers free, self-serve SSO and SCIM on any paid plan with support for Microsoft Entra…
Connect Microsoft Entra ID (formerly Azure Active Directory) to Tallyfy in about 30 minutes. Your users get automatic login and account creation - no separate passwords needed.
You configure both Microsoft Entra ID and Tallyfy yourself. The Tallyfy SSO wizard is where you copy the SP values out and paste the Entra metadata back in.
Key points:
Sign in to the Azure Portal ↗ with administrator credentials
Go to the Microsoft Entra ID service (may still show as Azure Active Directory in some interfaces)
Select Enterprise Applications from the Manage section
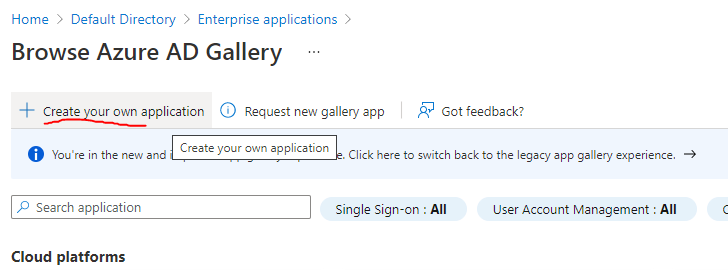
Click +New application
Choose Create your own application
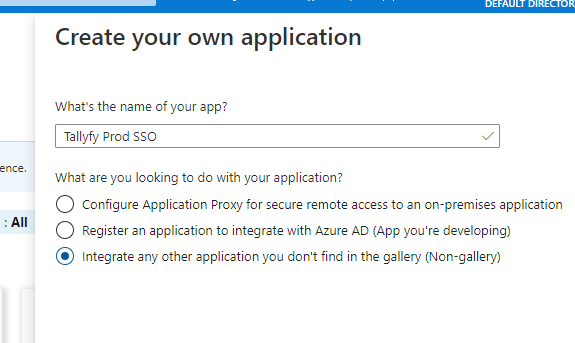
Enter “Tallyfy” as the application name
Select Integrate any other application you don’t find in the gallery (Non-gallery)
Click Create
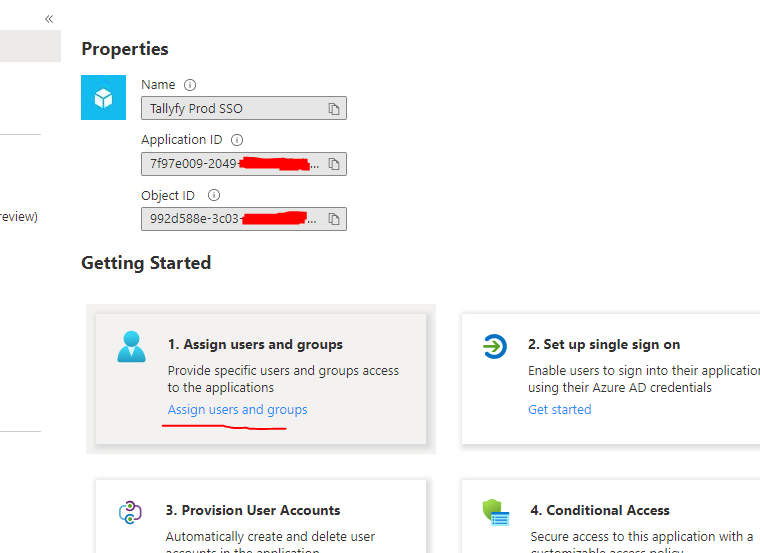
Assign users now or after setup - your choice:
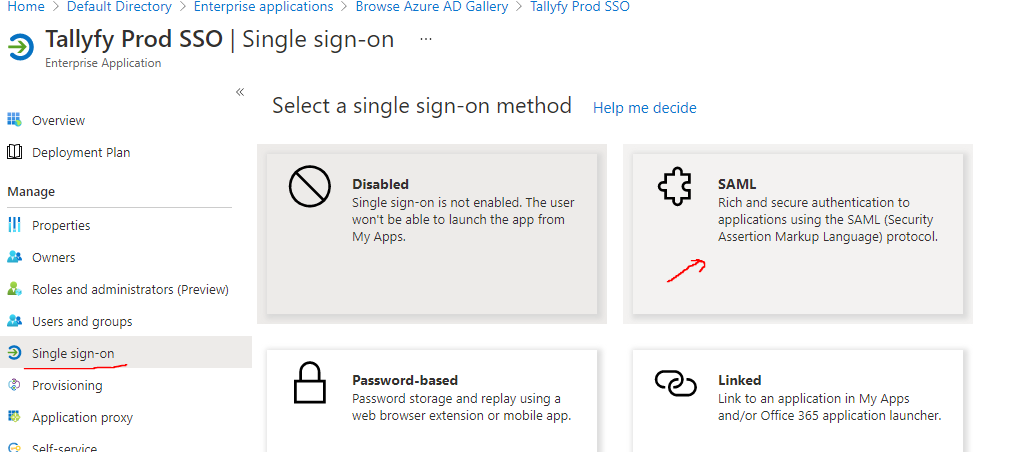
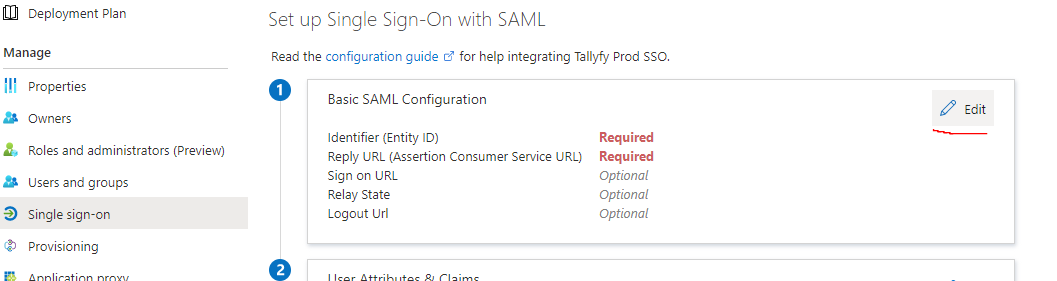
In the application’s sidebar under Manage, select Single sign-on
Choose SAML as the sign-on method
Click Edit in the Basic SAML Configuration section.
In Tallyfy, go to Settings > Organization > Security > SSO.
Start a new connection and pick Microsoft Entra ID as the provider.
Copy the SP ACS URL and SP Entity ID shown on the first step of the wizard.


Copy Tallyfy’s SP ACS URL to Microsoft Entra ID’s Reply URL (Assertion Consumer Service URL) field.
Copy Tallyfy’s SP Entity ID to Microsoft Entra ID’s Identifier (Entity ID) field.
Click Save.
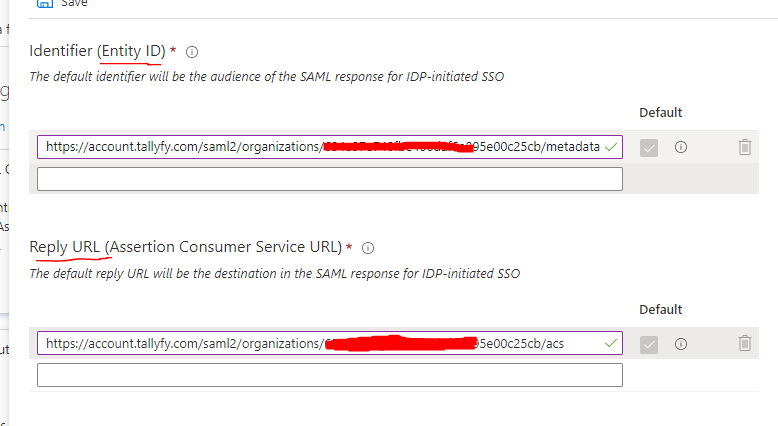
These must be exact - wrong names or capitalization will break user sync.
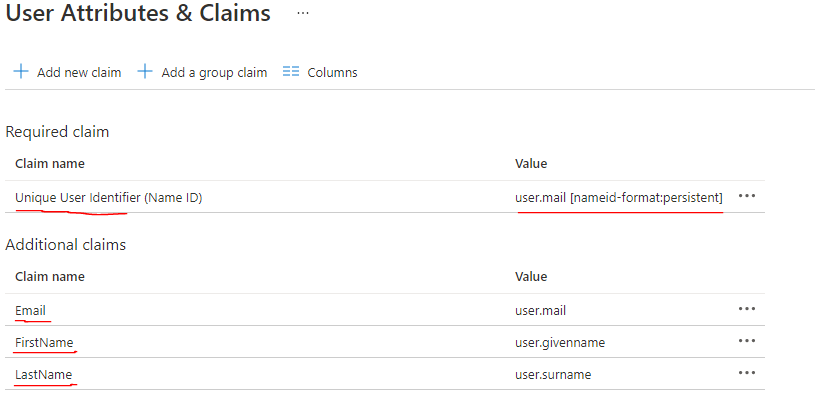
Configure Name Identifier (User ID): Click the Unique User Identifier (Name ID) row.
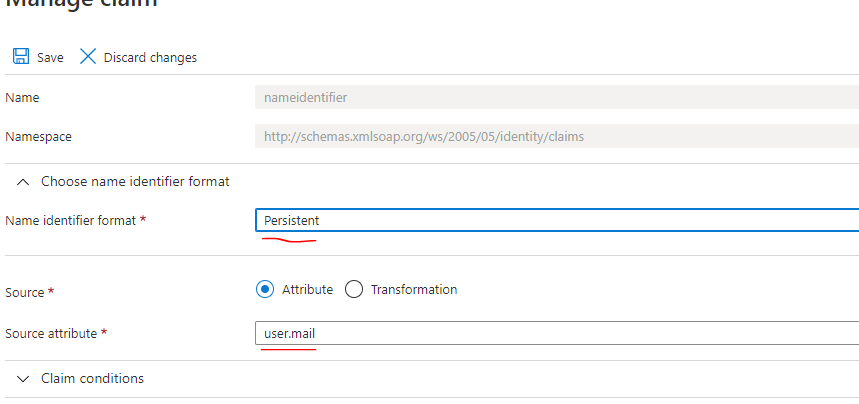
Select Persistent for Name identifier format.
Choose user.mail for Source attribute.
Click Save.
Configure First Name Attribute: Click the attribute row (typically user.givenname).
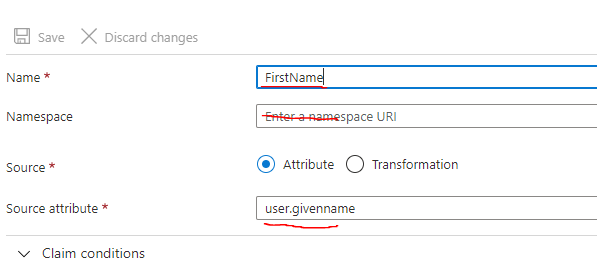
Set Name to: FirstName (capitalization matters).
Clear the Namespace field.
Set Source attribute to: user.givenname.
Click Save.
Configure Email attribute: Set Name to Email, clear Namespace, set Source attribute to user.mail. Click Save.
Configure Last Name attribute: Set Name to LastName, clear Namespace, set Source attribute to user.surname. Click Save.
Your final attribute config should look like this:
You need your Entra metadata. The simplest path is the metadata URL:
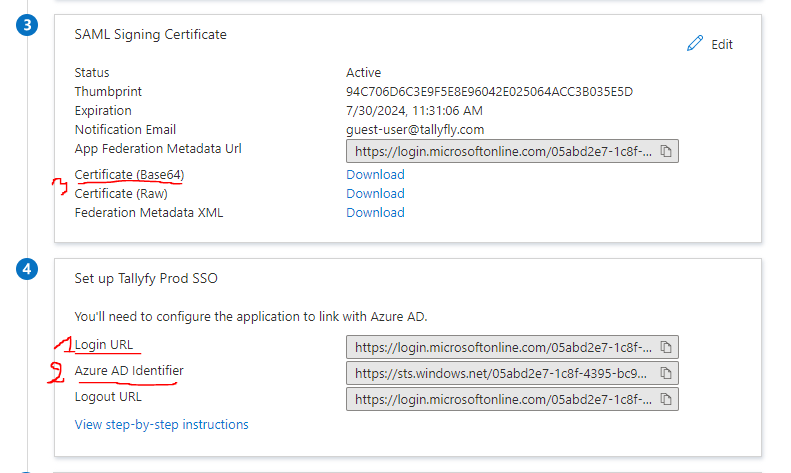
Go to the Set up section (it’s the SAML signing certificate area).
Copy the App Federation Metadata Url. Tallyfy can fetch this directly.
If you’d rather provide the values by hand, also copy the Login URL and Microsoft Entra ID Identifier, and download the Certificate (Base64).
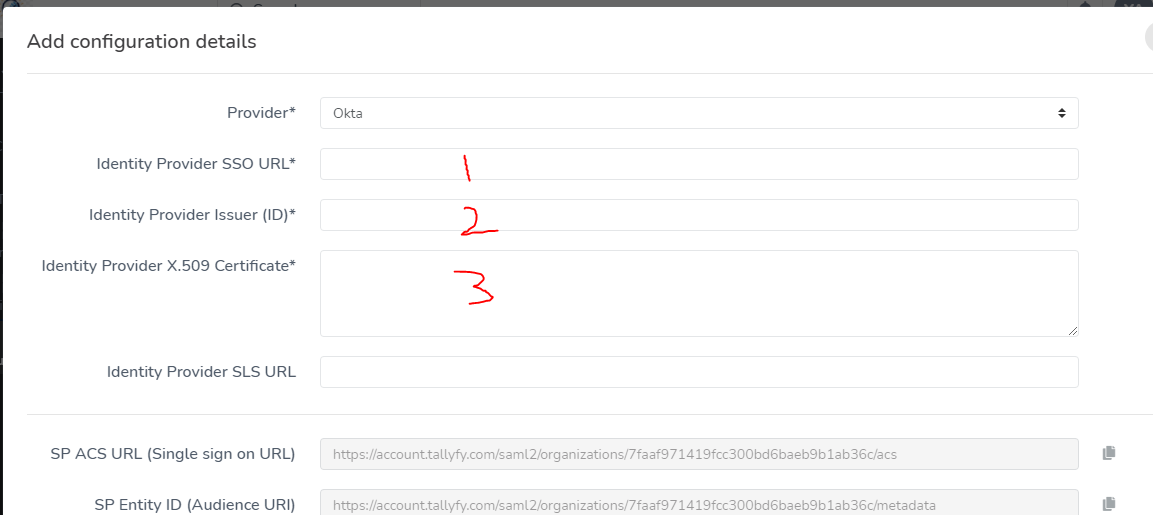
Back in the Tallyfy SSO wizard (Settings > Organization > Security > SSO), move to the Enter IdP details step:
Metadata URL - paste the App Federation Metadata Url. Tallyfy fetches and parses it. Easiest option.
Manual entry - enter the Login URL, the Microsoft Entra ID Identifier, and the Certificate instead.
Run the wizard’s Test connection step and fix anything it flags.
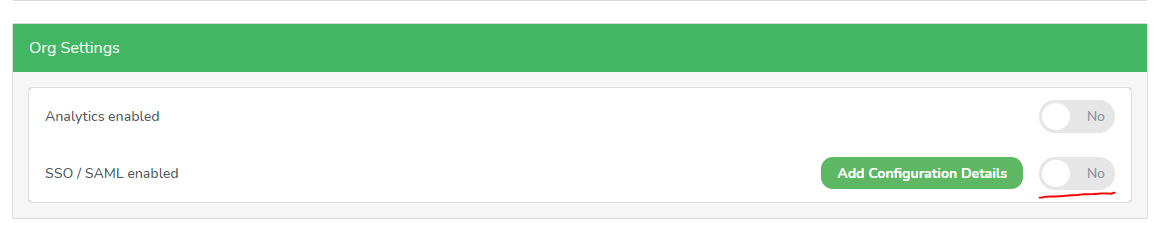
Once the test passes, click Enable to turn SSO on.
Get your organization’s SSO login URL from the SSO wizard (it’s shown next to the connection)
Share this URL with your Microsoft Entra ID users

When users visit this URL:
Users can’t log in? Check these:
SAML signs people in. SCIM keeps your directory in sync. With Entra provisioning on, Entra ID pushes user assignments and removals to Tallyfy automatically, so accounts track your directory and you stop paying for people who’ve left.
To map Entra groups to Tallyfy roles, provision groups whose names match Tallyfy’s reserved group names (for example tallyfy-admins). Full details are in SCIM provisioning.
Integrations > Authentication and SSO
Authentication > Integrate Okta SSO
Authentication > Integrate OneLogin SSO
Authentication > Integrate JumpCloud SSO