Integrations > Authentication and SSO
Tallyfy offers free, self-serve SSO and SCIM on any paid plan with support for Microsoft Entra…
Connect Google Workspace (formerly G Suite) with Tallyfy using SAML-based Single Sign-On. Your users authenticate with their Google credentials - no separate Tallyfy passwords needed.
Sign in to the Google Workspace Admin console ↗
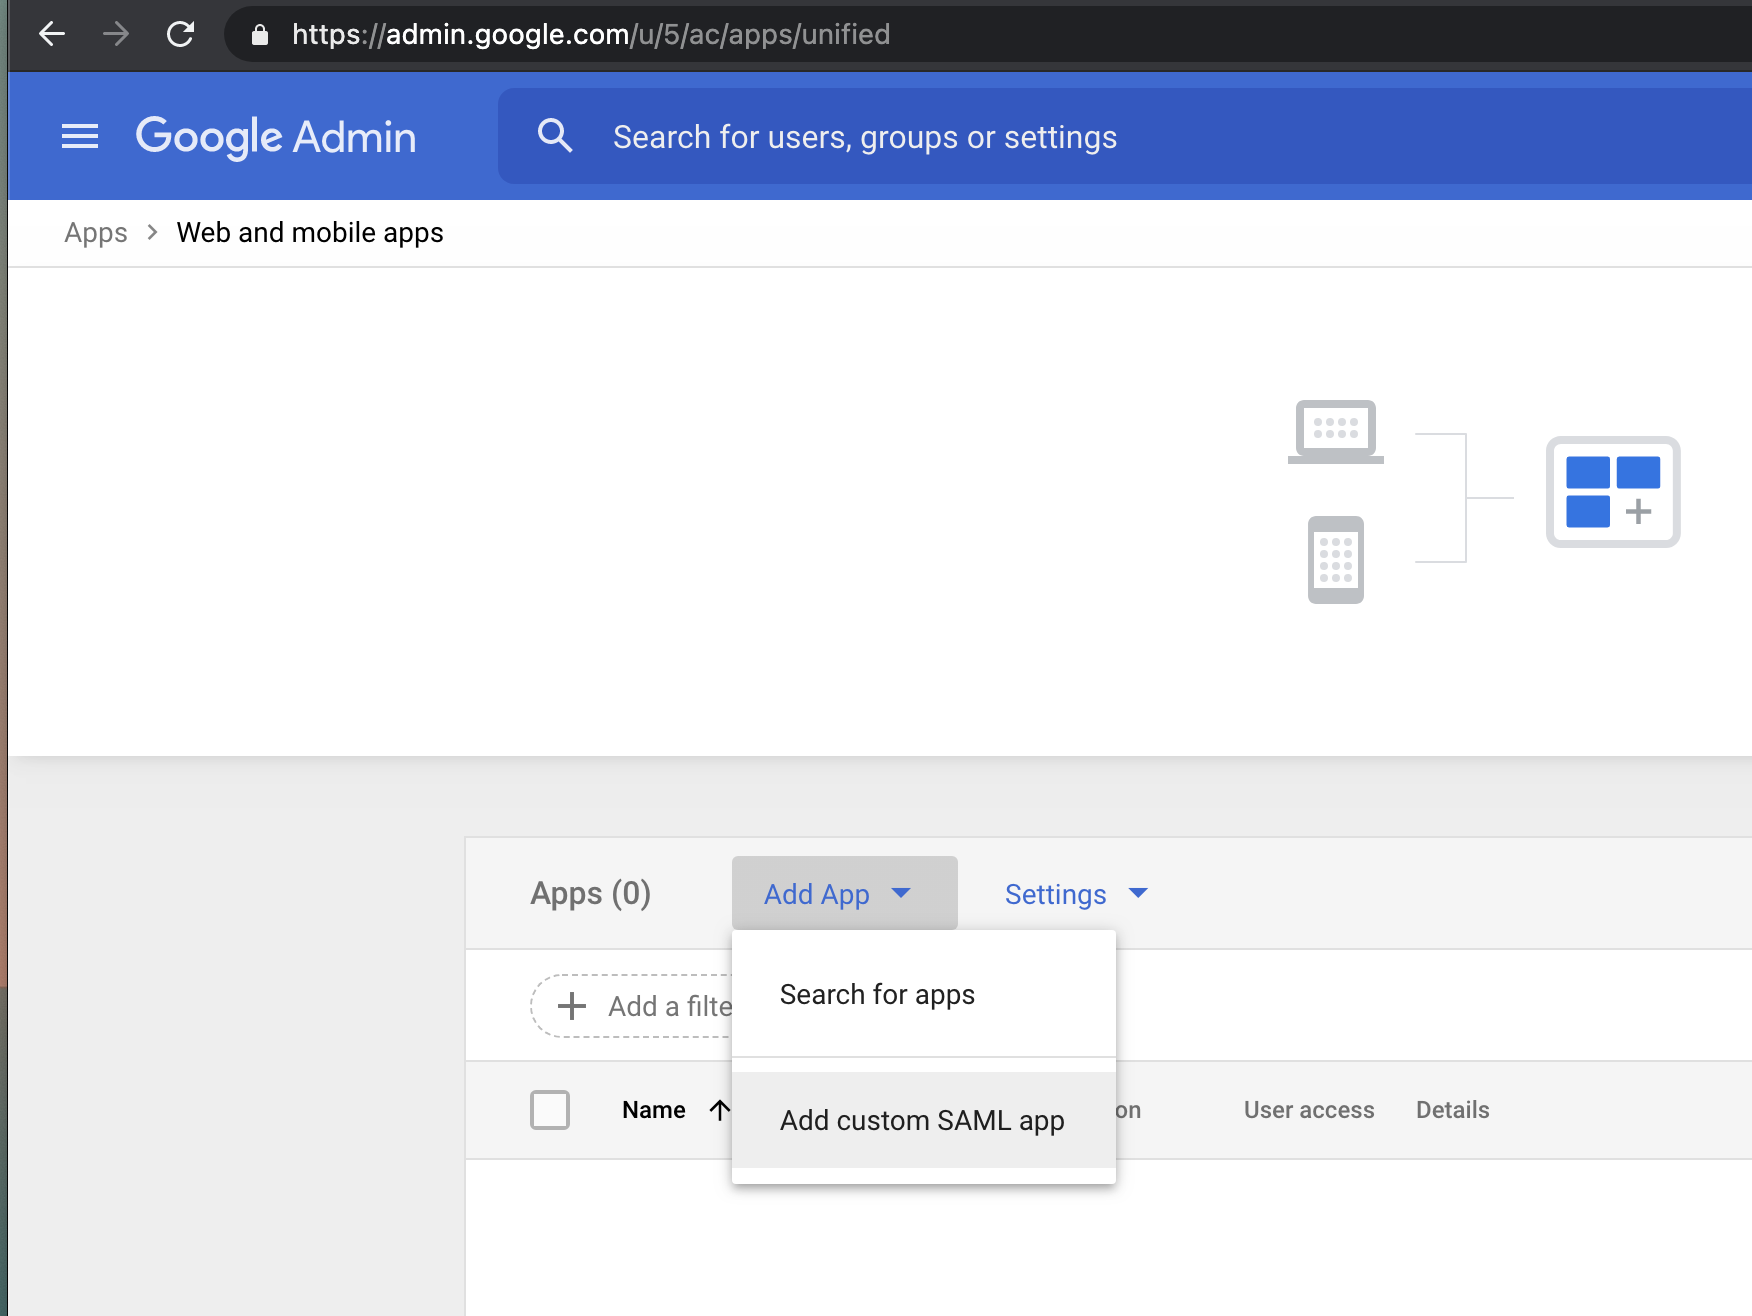
Go to Apps > Web and mobile apps
Click Add App > Add custom SAML app
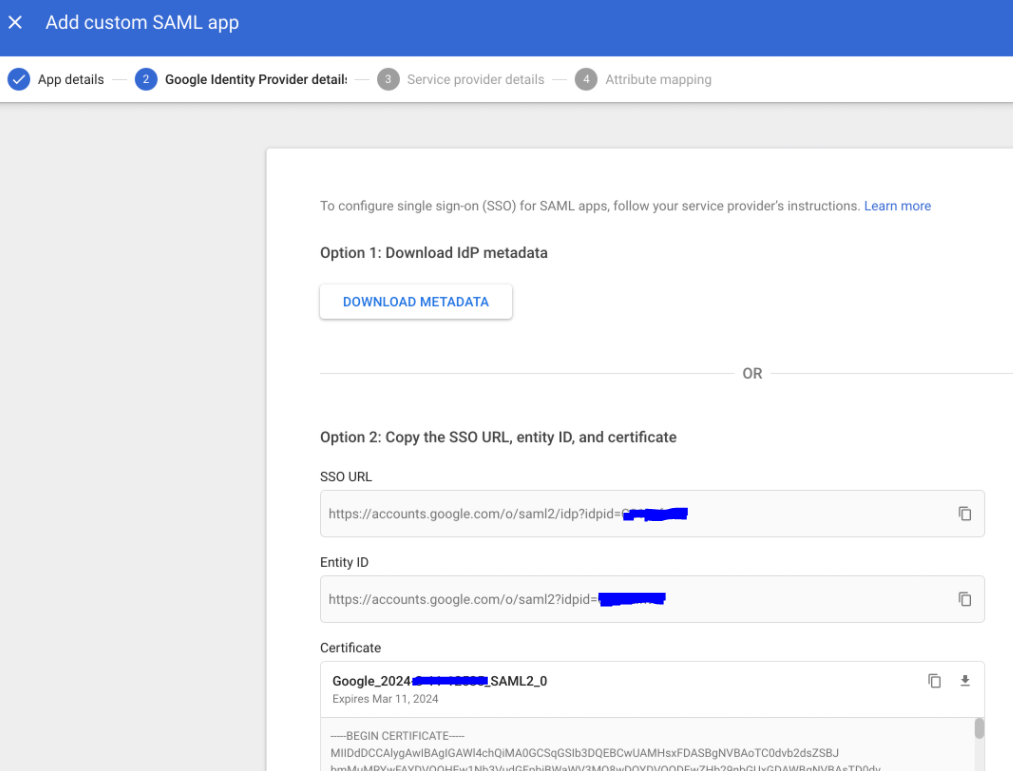
On the Google Identity Provider details page, copy the SSO URL (Single Sign-On URL).
Copy the Entity ID (Issuer).
Download the Certificate file.
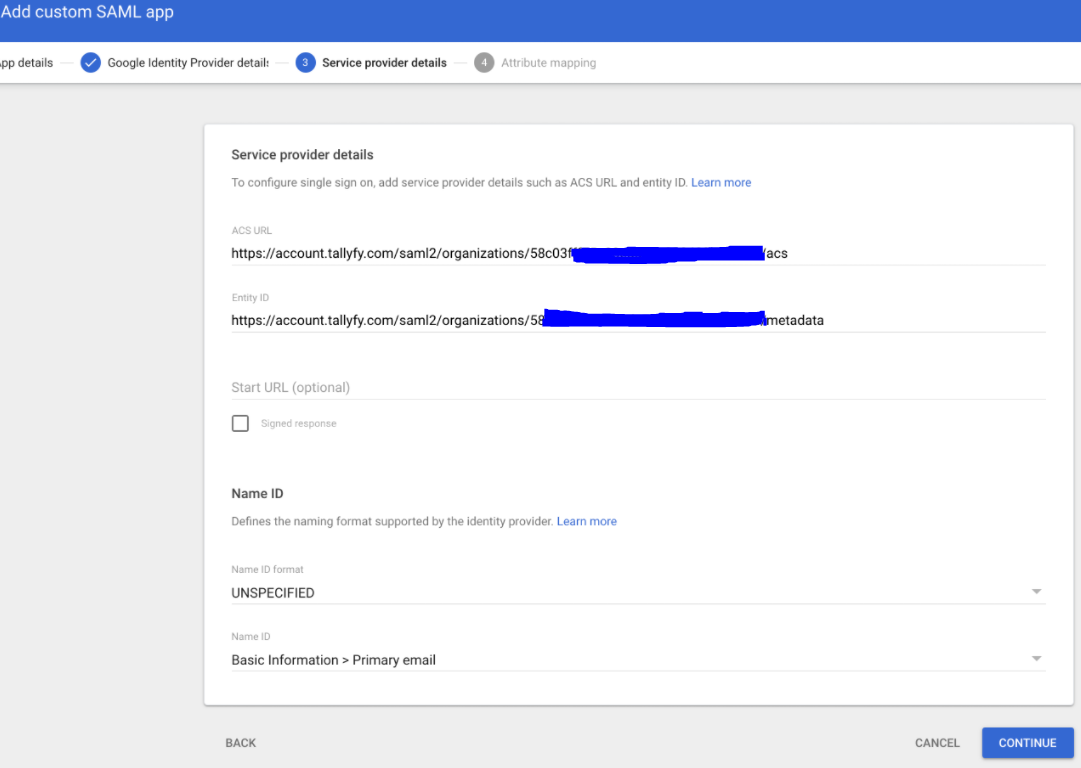
Get the Tallyfy SP values from the wizard first: in Tallyfy, go to Settings > Organization > Security > SSO, start a new connection, pick Google Workspace, and copy the SP ACS URL and SP Entity ID it shows. Then, back in Google:
Enter the Tallyfy ACS URL (Assertion Consumer Service URL) from the wizard.
Enter the Tallyfy Entity ID (Service Provider Entity ID) from the wizard.
Leave the Start URL field empty.
Map these user attributes exactly as shown:
| Google Directory Attribute | App Attribute |
|---|---|
| Primary Email | |
| First Name | FirstName |
| Last Name | LastName |
Click Finish. That’s it for the Google side.
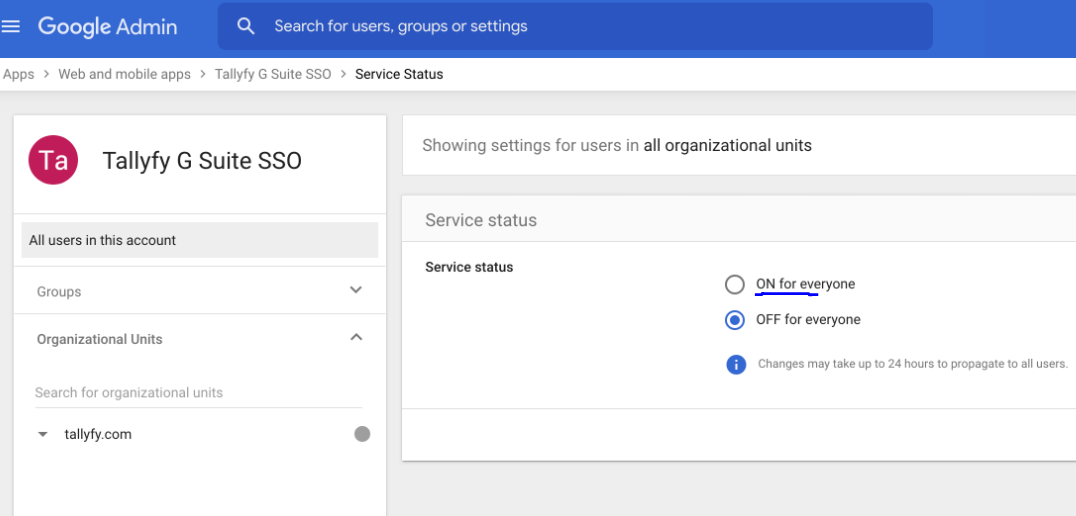
In the application settings, go to User Access
Set Service status to ON for everyone (or pick specific organizational units)
Back in the Tallyfy SSO wizard (Settings > Organization > Security > SSO), move to the Enter IdP details step and provide the Google details you collected in Step 3.
XML paste - if you downloaded Google’s IdP metadata, paste the file. Easiest option.
Manual entry - enter the SSO URL, the Entity ID, and the Certificate instead.
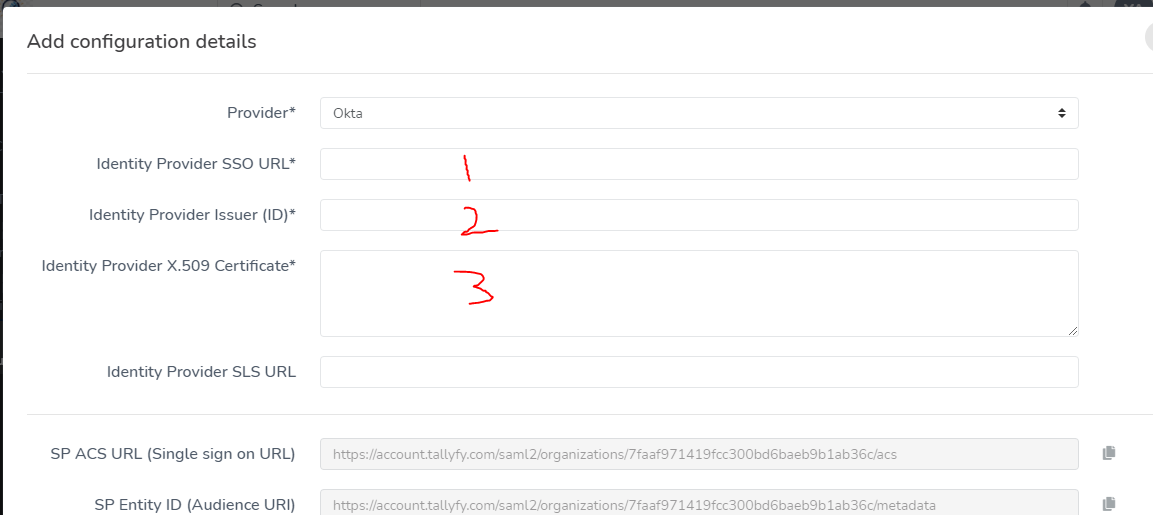
Google Workspace doesn’t publish a fetchable per-app metadata URL, so use XML paste or manual entry here.
Run the wizard’s Test connection step and fix anything it flags.
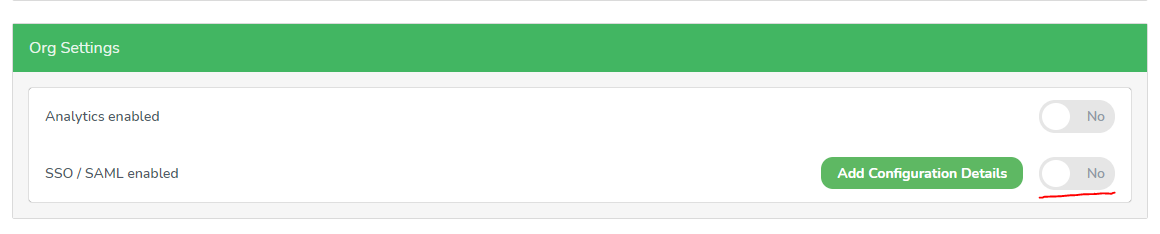
Once the test passes, click Enable to turn SSO on for your organization.
After you finish the integration:
Share your org’s SSO login URL with your users (you’ll find it in the SSO wizard next to the connection).

Confirm you’ve granted access to the SAML app in Google Workspace for users who need it.
Existing Tallyfy users sign in through the shared SSO URL - no separate passwords required.
New users from a verified domain are provisioned on first login when auto-join is on. Verify your domain under the Domains tab first. See Domain verification.
Here’s the full SAML authentication flow after configuration is done.
Key points:
Running into authentication problems? Check these:
Google Workspace doesn’t push SCIM to custom SAML apps the way Okta, Microsoft Entra ID, and OneLogin do, so there’s no SCIM connector to wire up on the Google side here. For Google, the practical pattern is verified-domain auto-join: any Google user on a verified domain gets a Tallyfy account on first SSO login. If you want full directory sync (automatic deactivation and group-to-role mapping) and you also run Okta or Entra, configure SCIM provisioning through that provider instead.
Integrations > Authentication and SSO
Authentication > Integrate OneLogin SSO
Authentication > Integrate Okta SSO
Authentication > Integrate JumpCloud SSO