Tallyfy webhooks automatically push JSON data to external systems when a process launches or completes or when a specific task is finished and the payload carries all accumulated form fields and process metadata up to that point so you can connect workflows to spreadsheets CRMs email tools and other apps through middleware like Zapier or Make.com without polling.
Details about webhooks
Tallyfy webhooks send automated JSON messages to external systems when specific workflow events happen. They POST data to URLs you define, giving you real-time integration with other apps. This guide covers how to set them up and avoid common pitfalls.
Tallyfy has two webhook levels:
Template-level webhooks fire when any step in a process is completed, when a process is launched, or when a process is completed. They send the full process data - all form fields and step statuses. Think of these as the “firehose” option.
When a step has its own webhook URL set, that takes priority over the template-level webhook for that specific step.
Use cases:
- Track overall process progress in external systems
- Update dashboards when any step changes
- Capture new process launches or completions
Step-level webhooks fire only when a specific step is completed. More surgical - they only trigger when that particular step is done.
Use cases:
- Send notifications at key process milestones
- Trigger follow-up actions in other systems
- Export form field data collected at a particular step
This diagram shows how Tallyfy sends webhook data to external systems when events occur in your workflows.

What to notice:
- Two trigger types - Template-level webhooks fire on any step completion, process launch, or process completion. Step-level webhooks only fire for that specific step.
- Priority - If a step has its own webhook URL, it’s used instead of the template-level webhook for that step’s completion event.
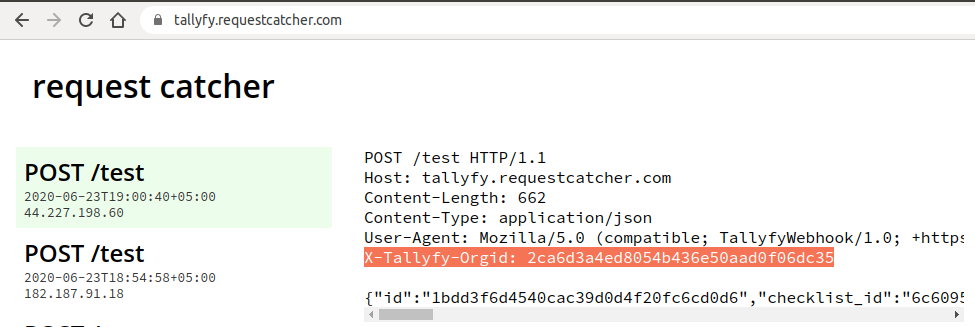
- Security - The
X-Tallyfy-orgIDheader is included in every webhook request. Always validate this in your receiving system.
- Navigate to the template you want to configure
- Click Edit to enter template editing mode
- Open the Advanced Settings drawer
- Find the Webhooks section
- Toggle webhook functionality on
- Enter the destination URL in the Template webhook URL field
- Note the Template alias - you’ll need it in your integration
- Navigate to the template containing your target step
- Click Edit to enter template editing mode
- Select the specific step that should trigger the webhook
- Open the Advanced tab
- Toggle webhook functionality on
- Enter the destination URL in the webhook URL field
- Save your changes
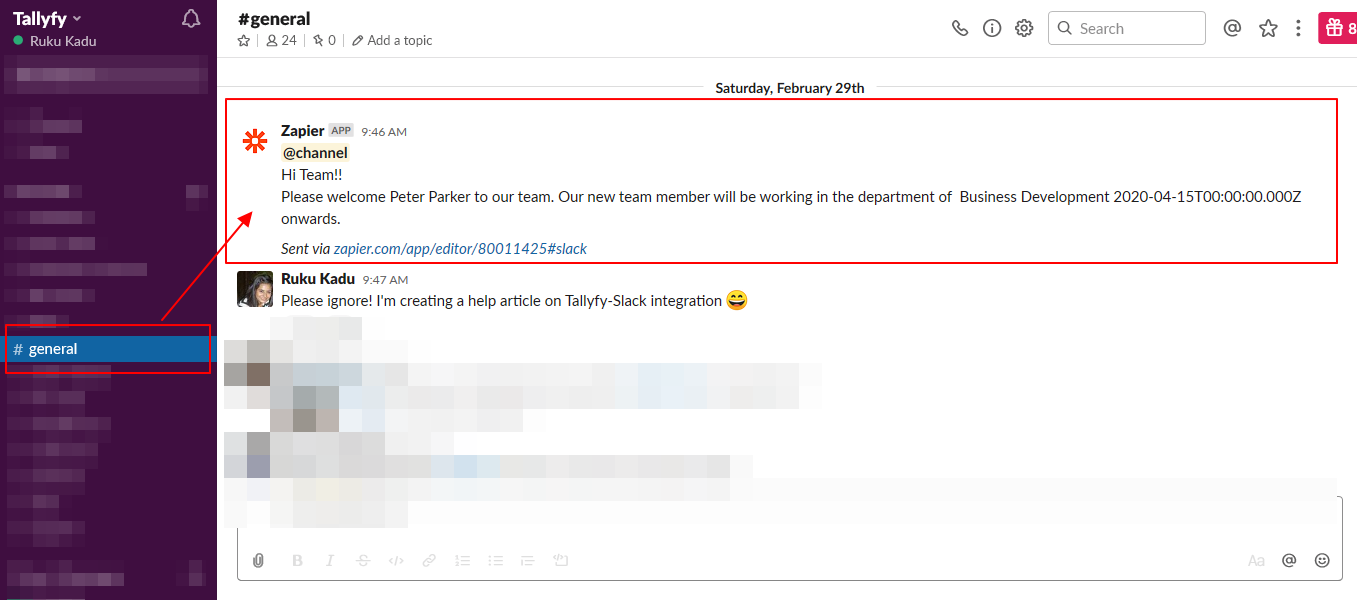
Here’s how to send Slack notifications when an employee completes an onboarding step in Tallyfy.
- Tallyfy account with Professional or Enterprise plan
- Middleware account (Make.com, Power Automate, n8n, or Zapier)
- Slack workspace with admin access
-
Sign in to your middleware platform
-
Create a new workflow (“Zap” in Zapier, “Flow” in Power Automate, “Scenario” in Make)
-
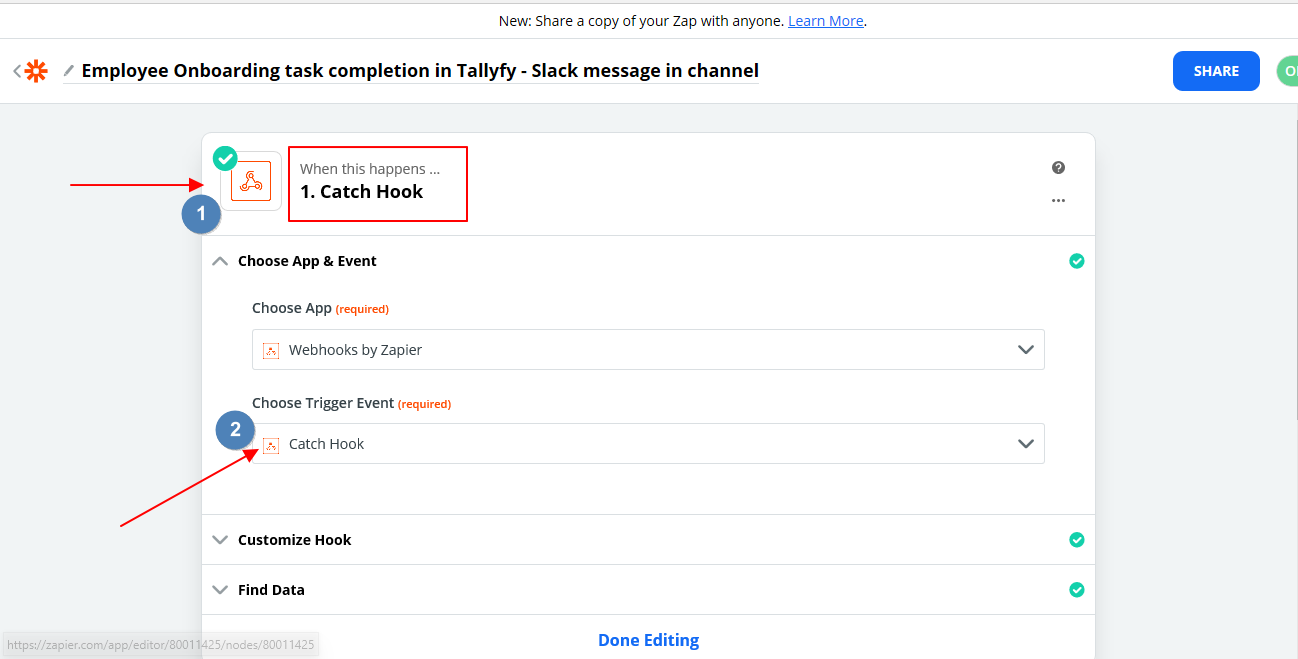
Select Webhooks as the trigger app
-
Choose Catch Hook or When HTTP request is received as the trigger event
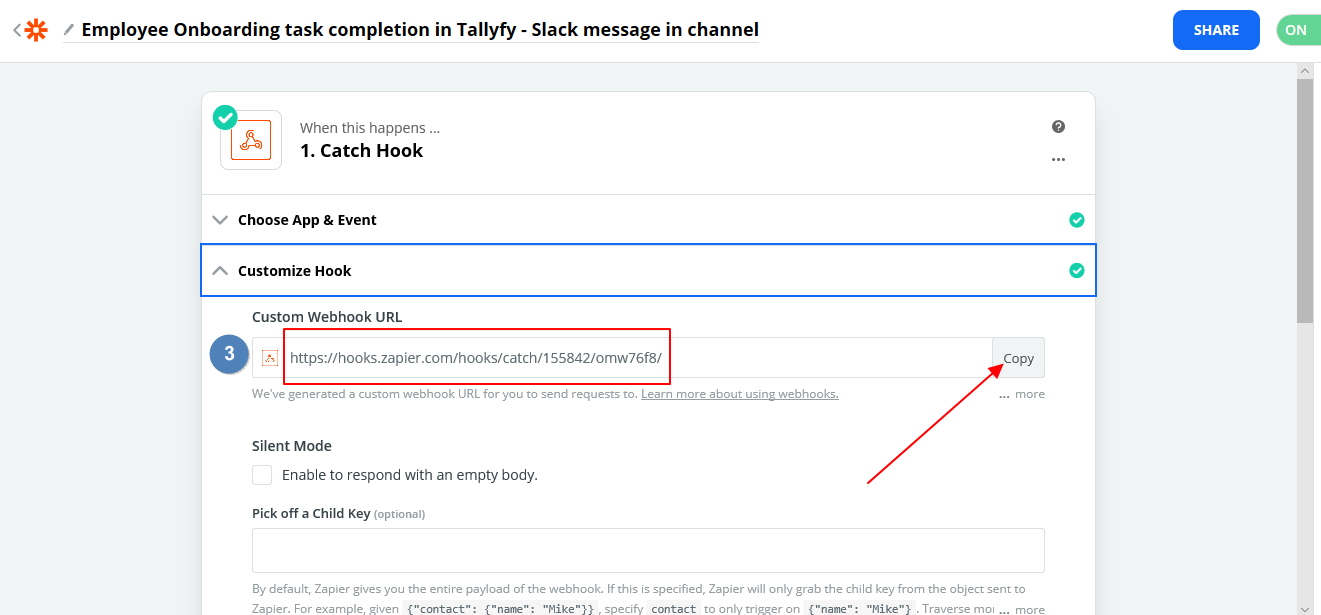
-
Copy the webhook URL provided by your middleware platform - you’ll paste it into Tallyfy next
-
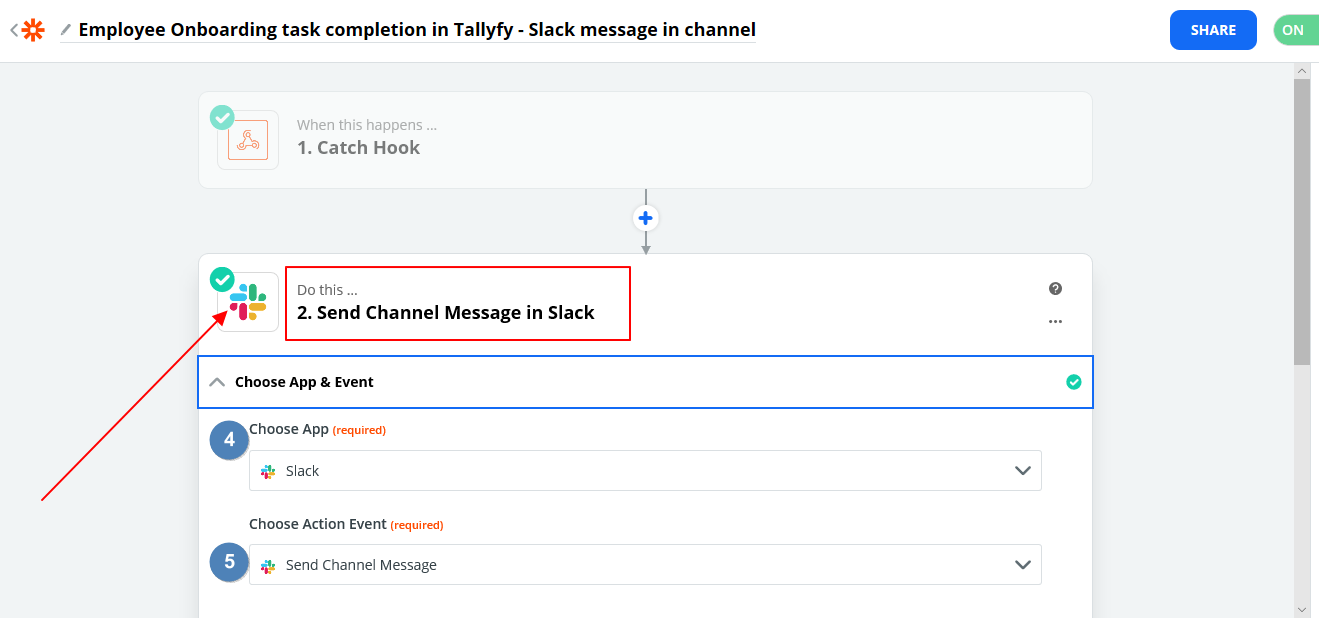
Add an action step to your workflow.
-
Select Slack as the action app.
-
Choose Send Channel Message as the action event.
-
Connect your Slack account if not already connected.
-
Select the destination channel (e.g., #general).
-
Build a message template using the webhook data fields.
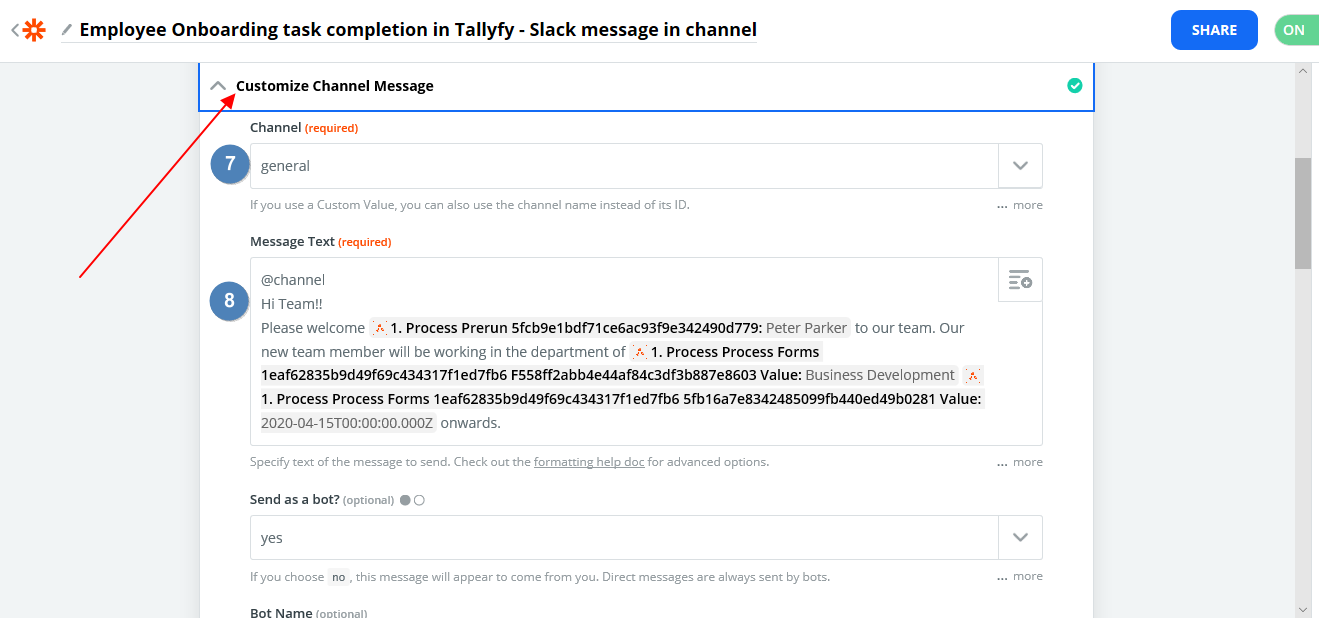
-
Include details like process name, step name, and assignee.
- Navigate to your onboarding template in Tallyfy.
- Enter Edit mode.
- For template-level notifications, open the Advanced Settings drawer.
- Toggle webhooks on.
- Paste the middleware webhook URL into the Template webhook URL field.
- For step-specific notifications, select the relevant step instead.
- Open the Advanced tab for that step.
- Toggle webhooks on and paste the middleware webhook URL.
- Save your changes.
-
Run your onboarding process
-
Complete the relevant step
-
Verify the notification appears in your Slack channel
Tallyfy includes the X-Tallyfy-orgID header in all webhook requests. Validate this header against your organization’s ID to confirm the webhook is legitimate - you don’t want to process random webhook spam.
Handle duplicate webhook events
Webhooks can fire multiple times for the same event. For example, if a task is completed, then reopened and completed again, you’ll get multiple notifications. Always implement idempotency handling to prevent duplicate actions. It’s much easier to handle this from the start than debug it later.
Webhooks not firing? Here’s how to diagnose:
- Verify the URL is correct - Copy and paste it fresh, don’t type it manually
- Check URL accessibility - Test your webhook URL with RequestBin or Postman first
- Confirm webhook is enabled - Both the toggle AND the URL field must be set
- Test with a simple receiver - Use webhook.site or RequestBin to verify Tallyfy is sending data
- Check for HTTPS - Many receivers require HTTPS, not HTTP
- Look for auth requirements - Your receiver might be rejecting unauthenticated requests
- Verify step completion - Webhooks only fire when steps are actually completed (not just opened)
- Use HTTPS URLs for webhook destinations - HTTP is asking for trouble
- Validate the
X-Tallyfy-orgIDheader in your receiving system - Test webhooks before relying on them in production
- Monitor webhook delivery using your middleware platform’s logs
- Build retry logic into your receiving system for reliability
- Use webhook.site or RequestBin for initial testing before connecting production systems
- Validate the payload structure on your end - don’t assume it won’t change
Tallyfy webhooks automatically send structured JSON data to any external system via HTTP POST requests whenever workflow events like task completions or process launches occur — eliminating the need for constant polling and enabling instant real-time integrations with middleware platforms or custom APIs and serverless functions.
Webhooks > Send emails using webhooks
Tallyfy webhooks can be connected to middleware tools like Zapier or Make to automatically send custom emails with full process context whenever specific workflow events like task completions occur.
Webhooks > Webhook payload structure
Tallyfy webhook payloads deliver JSON data in two formats — process-level payloads containing full process state and kick-off form data when processes launch or complete and task-level payloads containing the completed task details along with all accumulated form fields and a next_task reference pointing to the first visible incomplete task plus guest-links that provide direct access URLs for external collaborators.
Was this helpful?
About Tallyfy
- 2025 Tallyfy, Inc.
- Privacy Policy
- Terms of Use
- Report Issue
- Trademarks