Add new steps or edit existing ones directly in Tallyfy templates.
Adding new steps
Open your template in Edit mode, scroll to the bottom, click Add Step, type a name, and press Enter. That’s it.
Modifying existing steps
To modify a step:
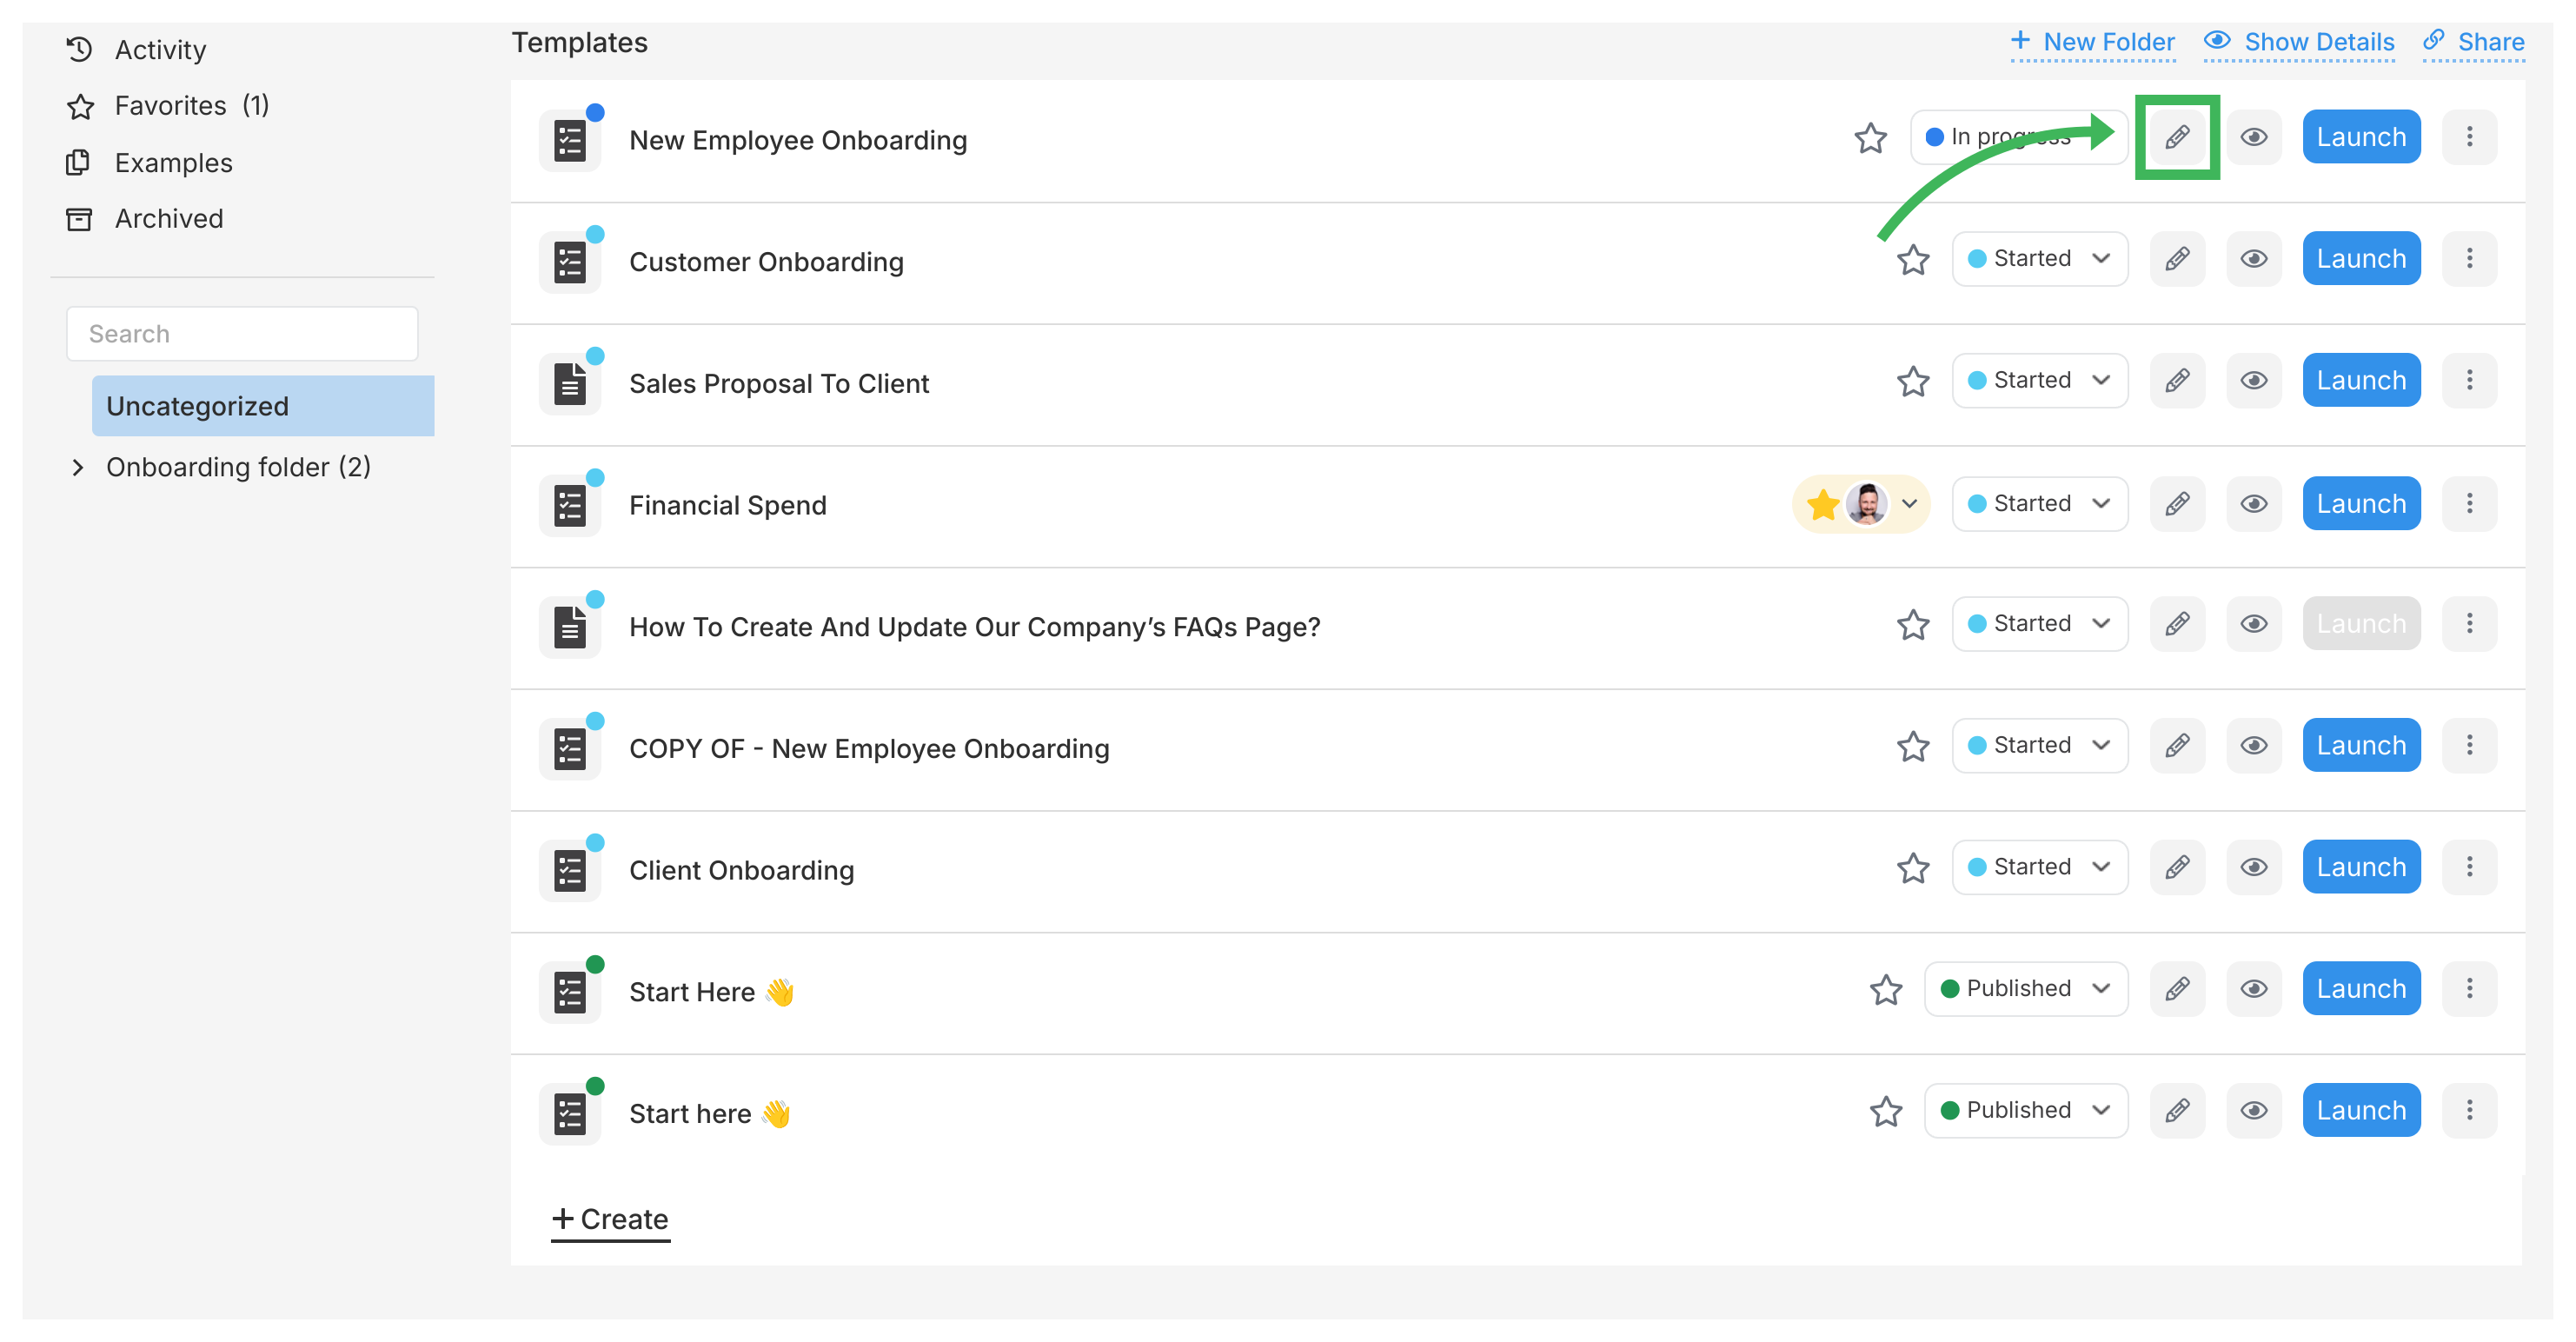
Go to the Templates library
Find your template and click the Edit icon (pencil symbol)
In edit mode, click any step to open its details panel on the right. Here’s what you can change:
Step description
Write instructions for the task. You can add text, formatting, images, files, links, tables, videos, variables, and snippets.
Click the step you want to edit.
Click the Description area in the details panel.
Use the toolbar to format text, add links, images, etc. See Insert Media for details.
Tallyfy saves changes automatically.
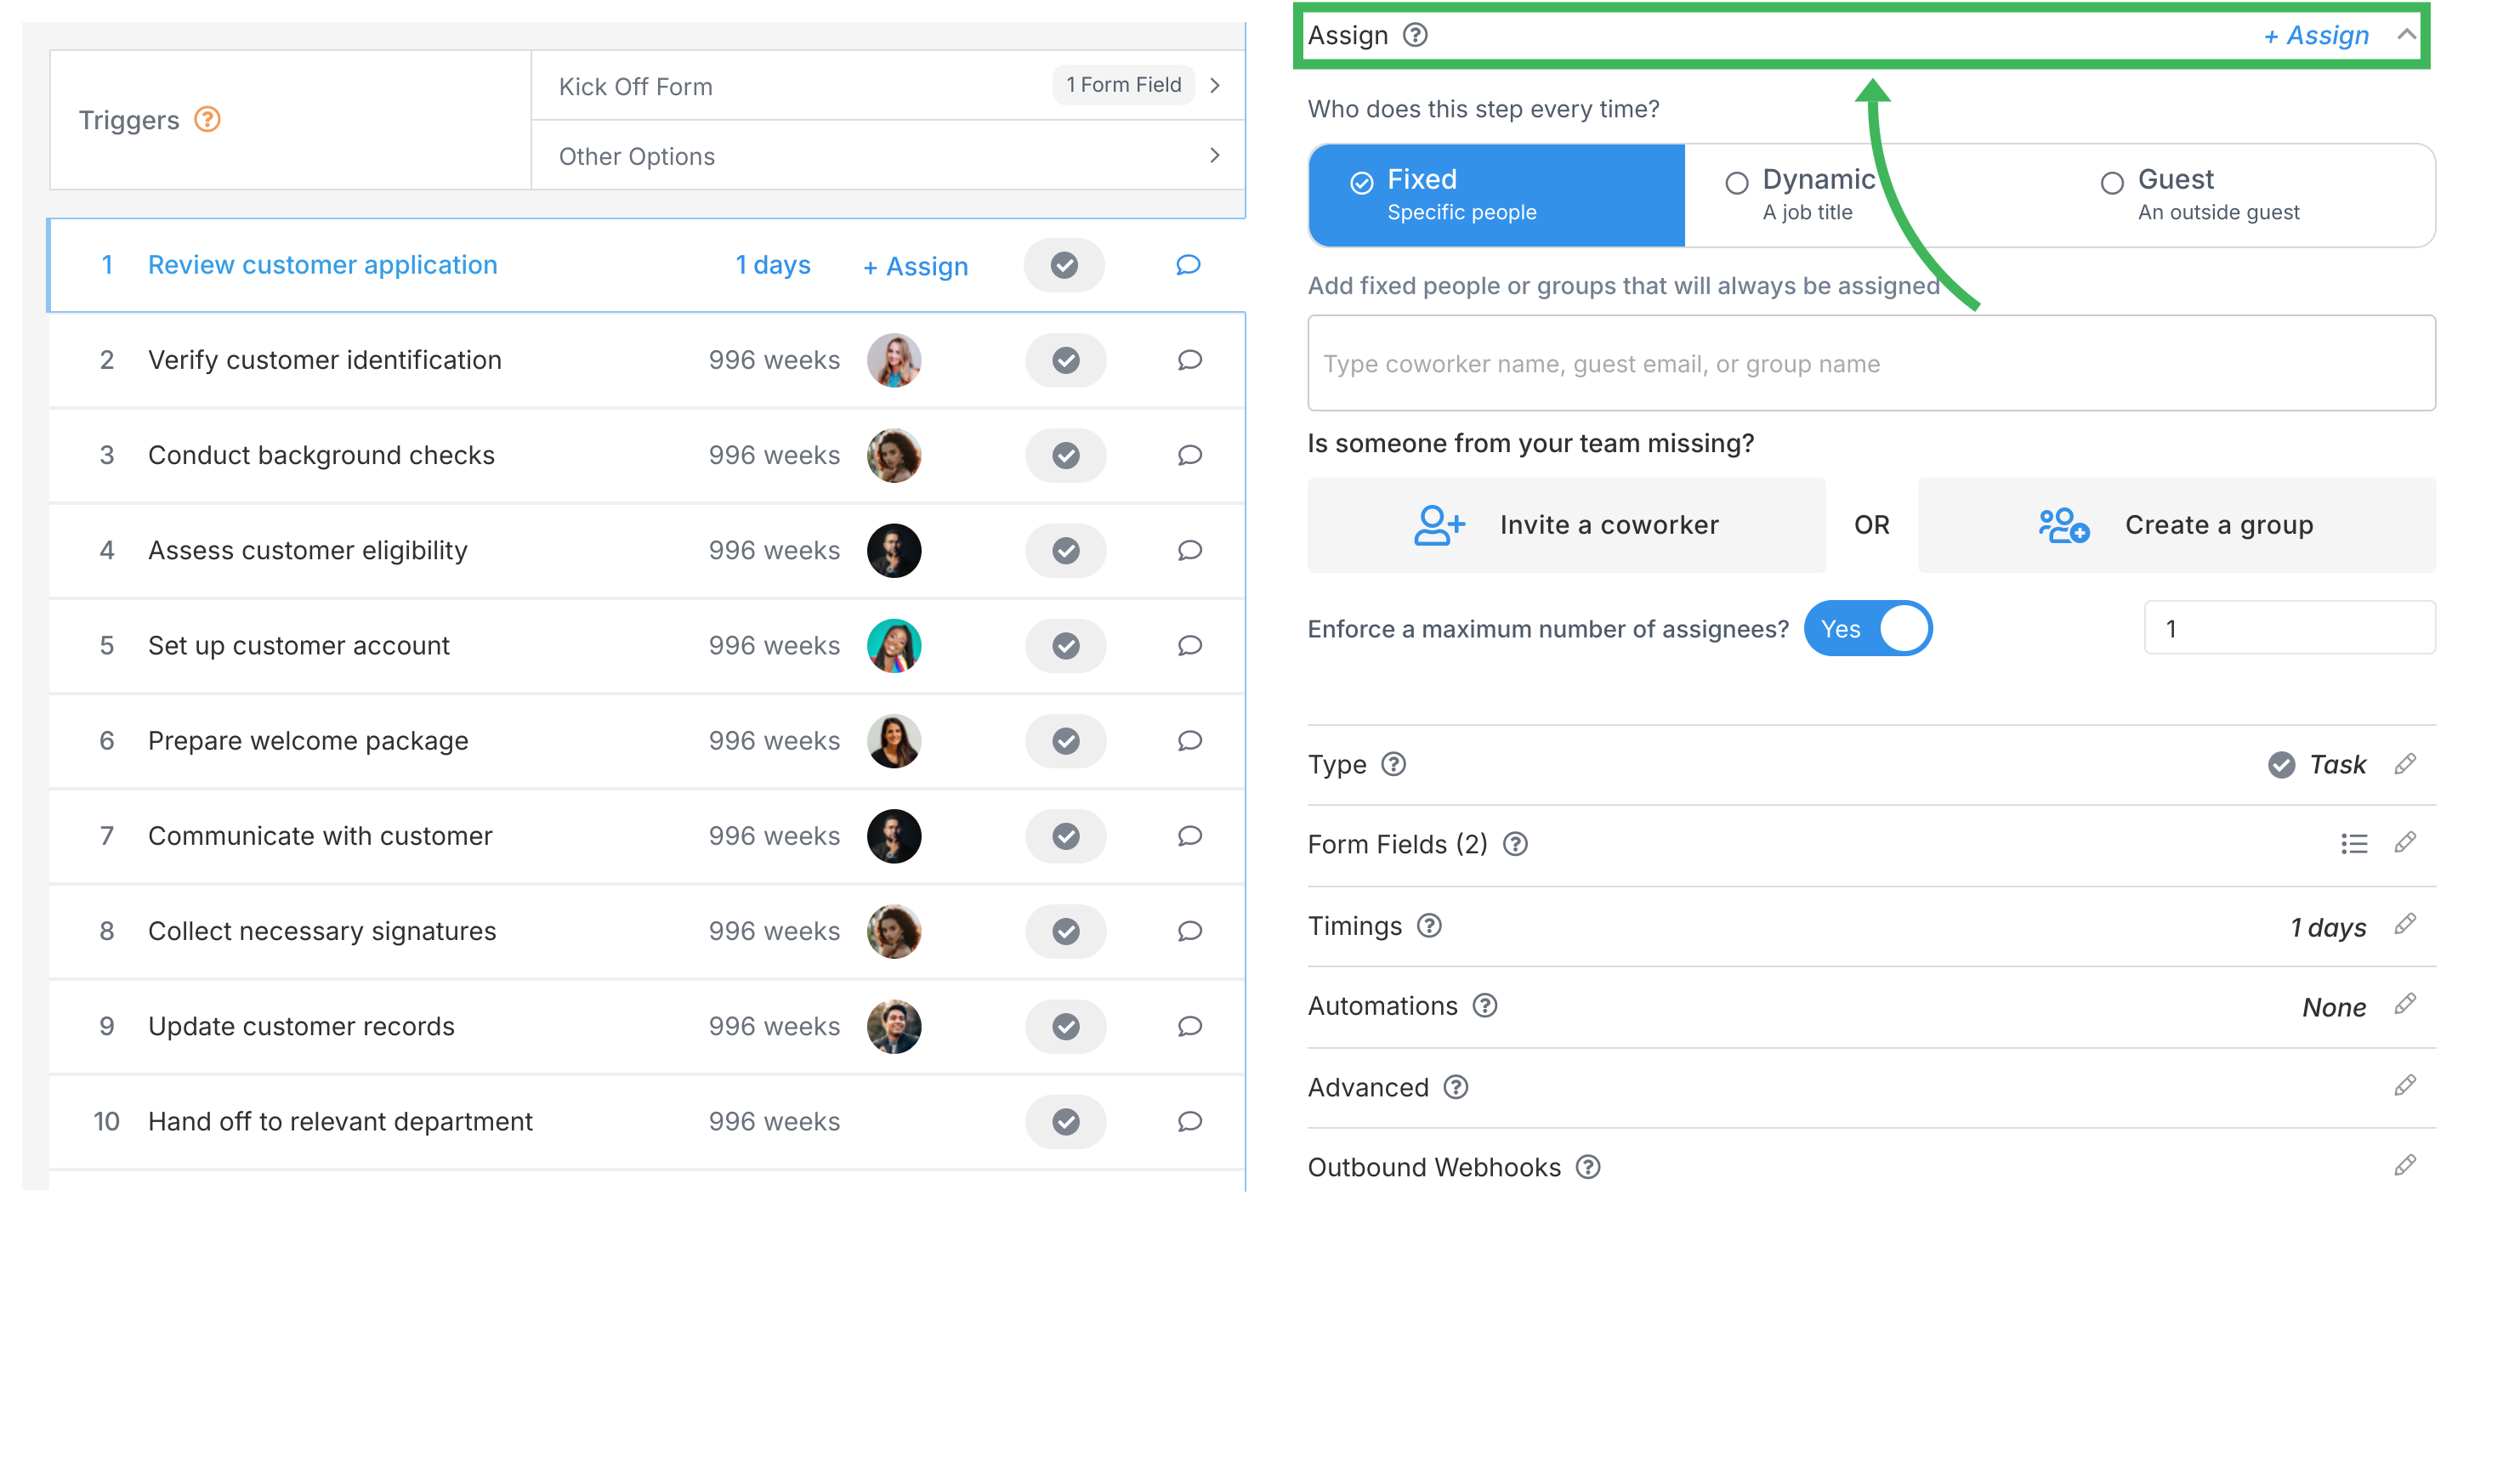
Assignment
Click the step you want to assign.
Go to the Assign tab in the details panel.
Pick an assignment method:
Specific Person/Group: Pick members or groups from the list.
Job Title: Assign by role (e.g., “Account Manager”).
Guest: Assign to someone outside your company via email.
Nobody right now: Leave unassigned initially (see note below).
“Nobody right now”: What happens at runtime depends on the Assign launcher automatically setting (in the Advanced tab). It’s ON by default - the person starting the process gets assigned. If OFF, the task stays unassigned.
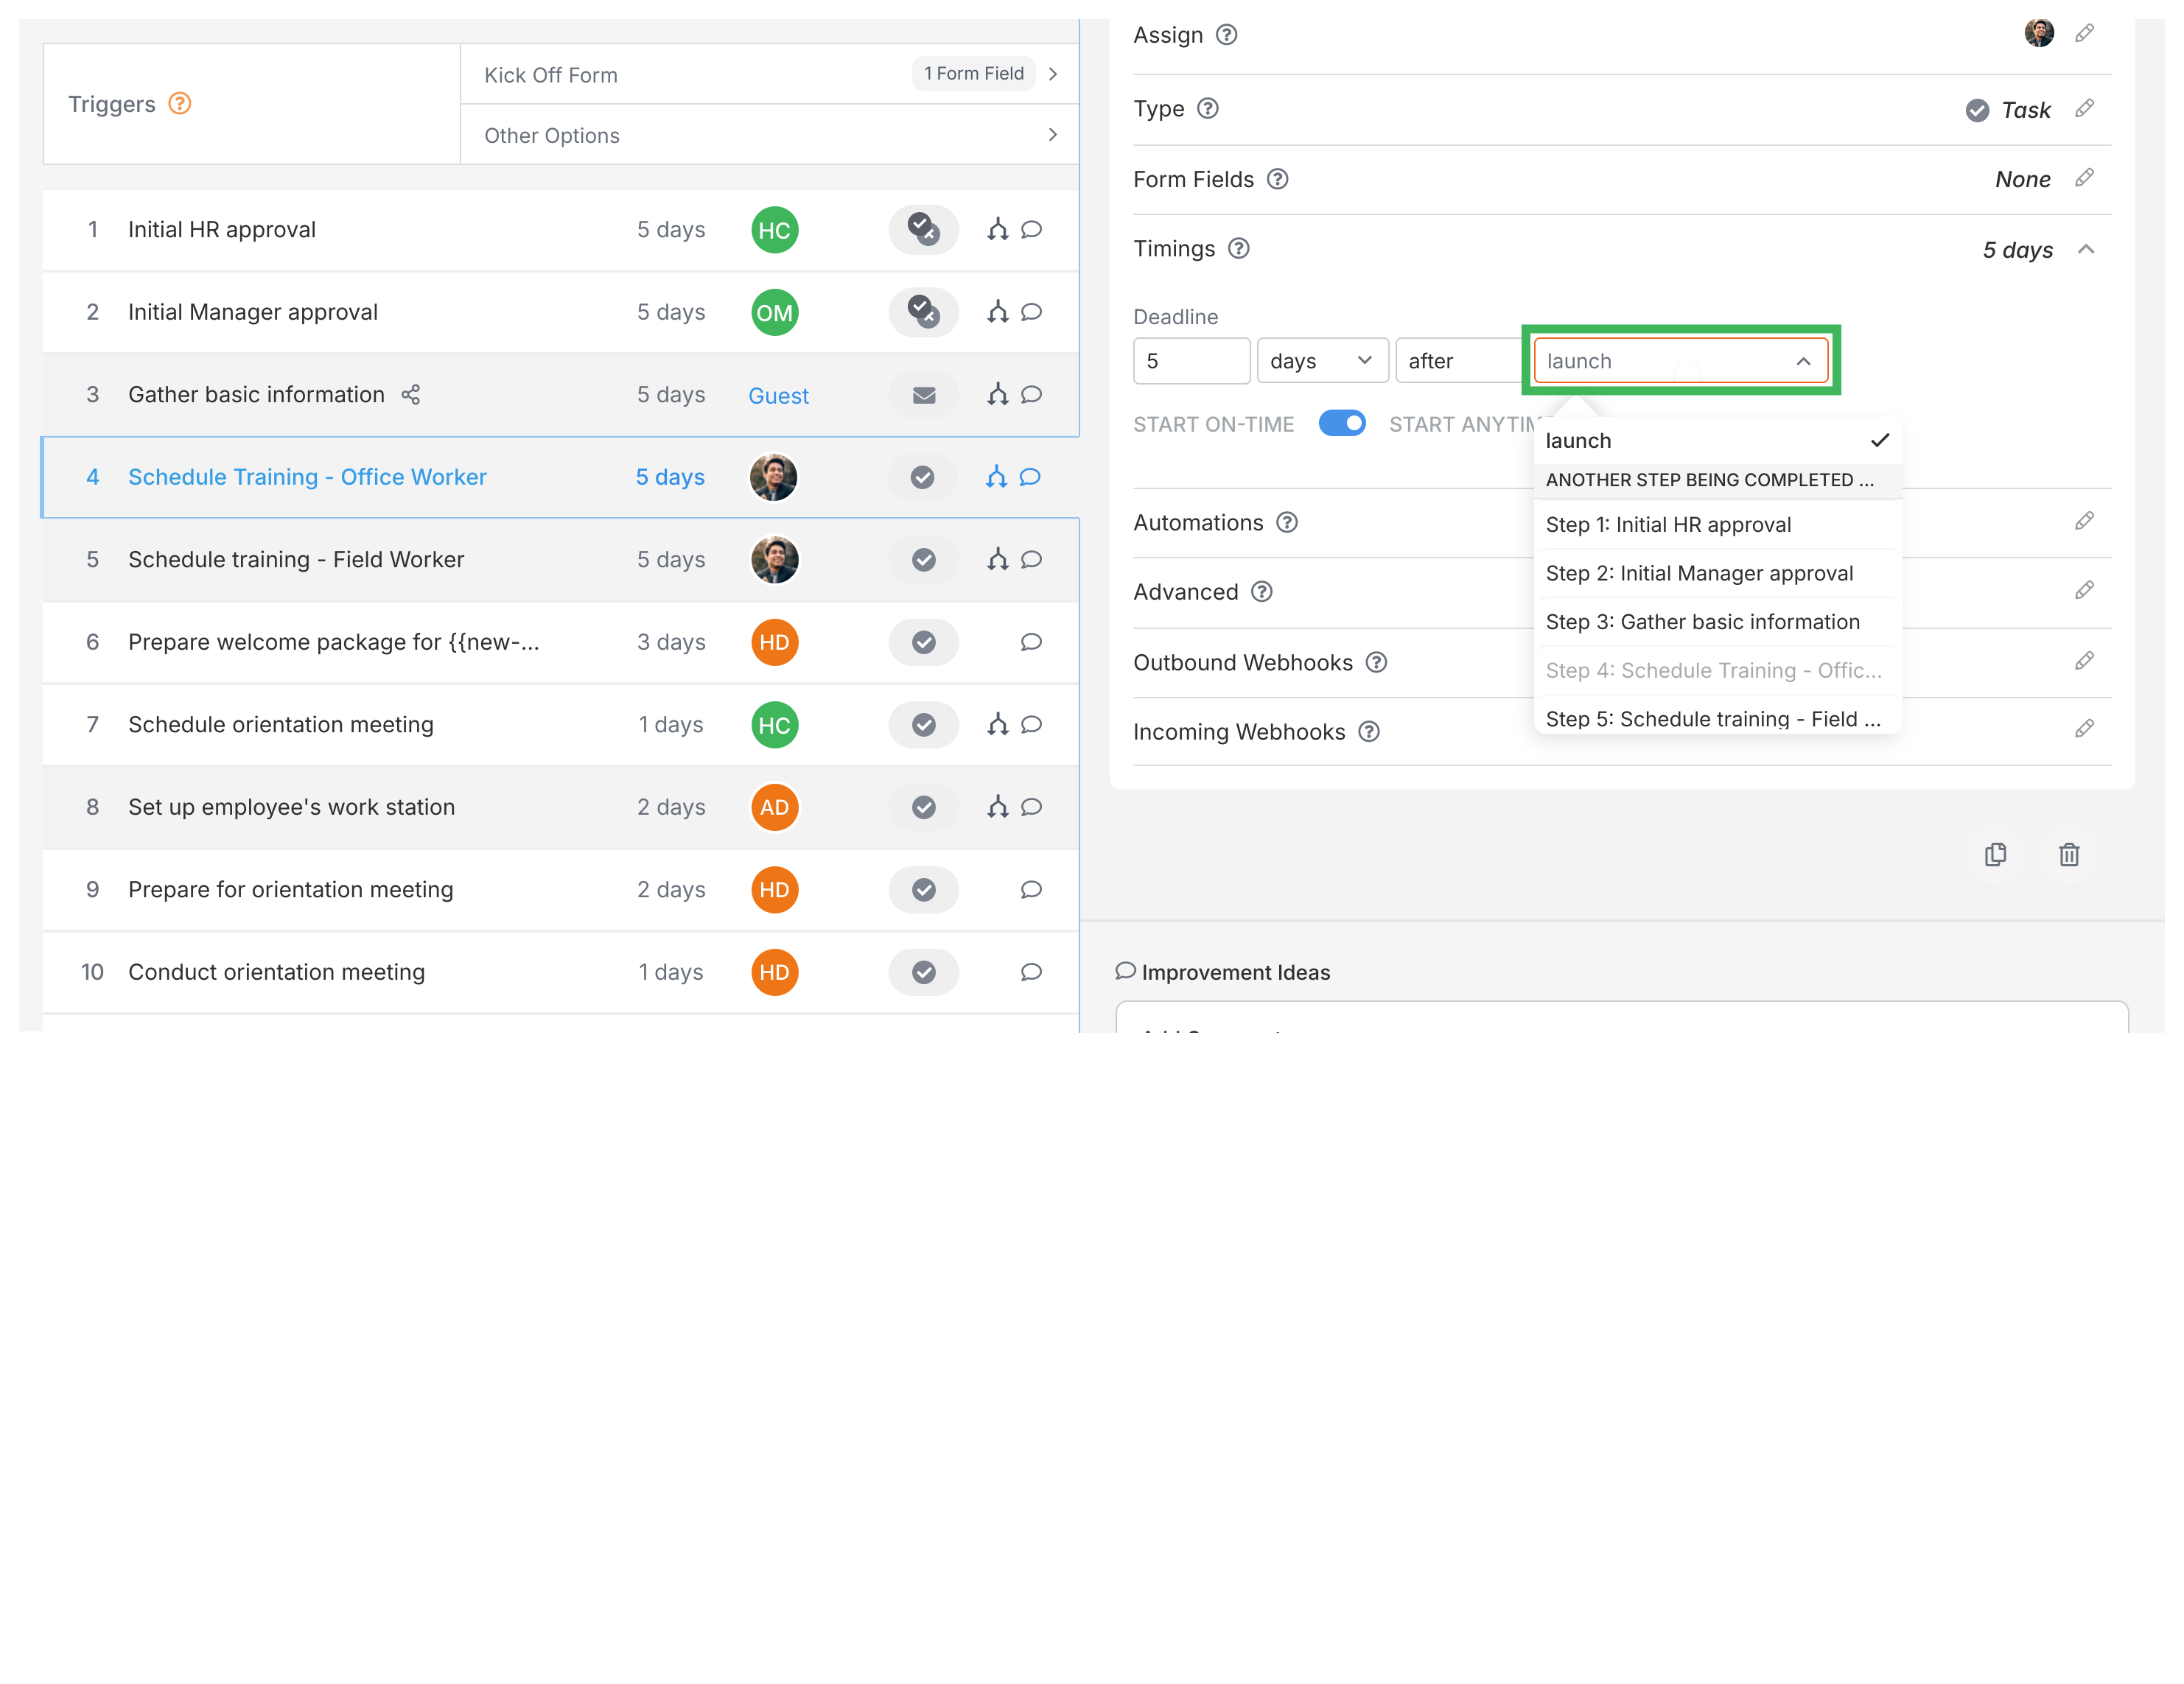
Set the deadline (when work should be complete) relative to:
Process Launch: Due X time after the process starts (default).
Another Step: Due X time after another specific step is completed.
Future Step Completion: Due X time before a later step’s due date. Useful for working backward from a final deadline (e.g., “Draft due 3 weeks before Publish Date”).
Choose Start On-Time or Start Anytime:
Start On-Time: Suggests when work should begin. Guidance only - not enforced.
Start Anytime: No suggested start time (default).
Advanced settings
Launch another process when complete: “Yes” auto-starts another process (from a different template) when this task finishes. You can inject tasks into the current process or start a separate one. See Launch another process guide.
All assignees must complete this task: “Yes” means the task isn’t done until every assignee marks it complete. Doesn’t apply to Administrators.
Assign launcher automatically: ON by default. If a step has no assignees, the person who launches the process gets assigned. Turn OFF to leave it unassigned.
Task is mandatory: “Yes” means this step can’t be removed when someone launches the process.
Only assigned members can complete or edit: “Yes” restricts the task to assigned people only (Administrators always have access).
Emit outbound webhook when completed: “Yes” sends a notification to another web service via a webhook when this task finishes.
Prevent guests from making or seeing comments: “Yes” hides comments from any guests assigned to this task.
Unique Step Alias: An internal ID for this step, used for webhook and API integrations.
Tags: Add tags to this step for filtering and organization.
Tallyfy lets you assign template steps to specific members or groups or job titles or guests through the Assign tab and also supports unassigned steps with dynamic automation rules that route tasks based on form answers or conditions like dollar amounts or priority levels.
Tallyfy’s advanced task options in template steps let you control behaviors like auto-launching linked processes and requiring all assignees to sign off and restricting who can complete tasks and firing webhooks to external systems and managing guest permissions and tagging steps for filtering.
Tallyfy’s Template Tools let you bulk-create steps by pasting a list and bulk-assign people or adjust deadlines across many steps at once instead of editing each one individually — and Administrators can also push templates into other users’ favorites for quick access.
Tallyfy lets you assign people to tasks at three stages — inside a template as defaults or during process launch or while a process is already running — and includes settings to auto-assign the launcher and restrict task completion to only assigned members.