Skip to content

Digital signatures

How to automate document signing using middleware

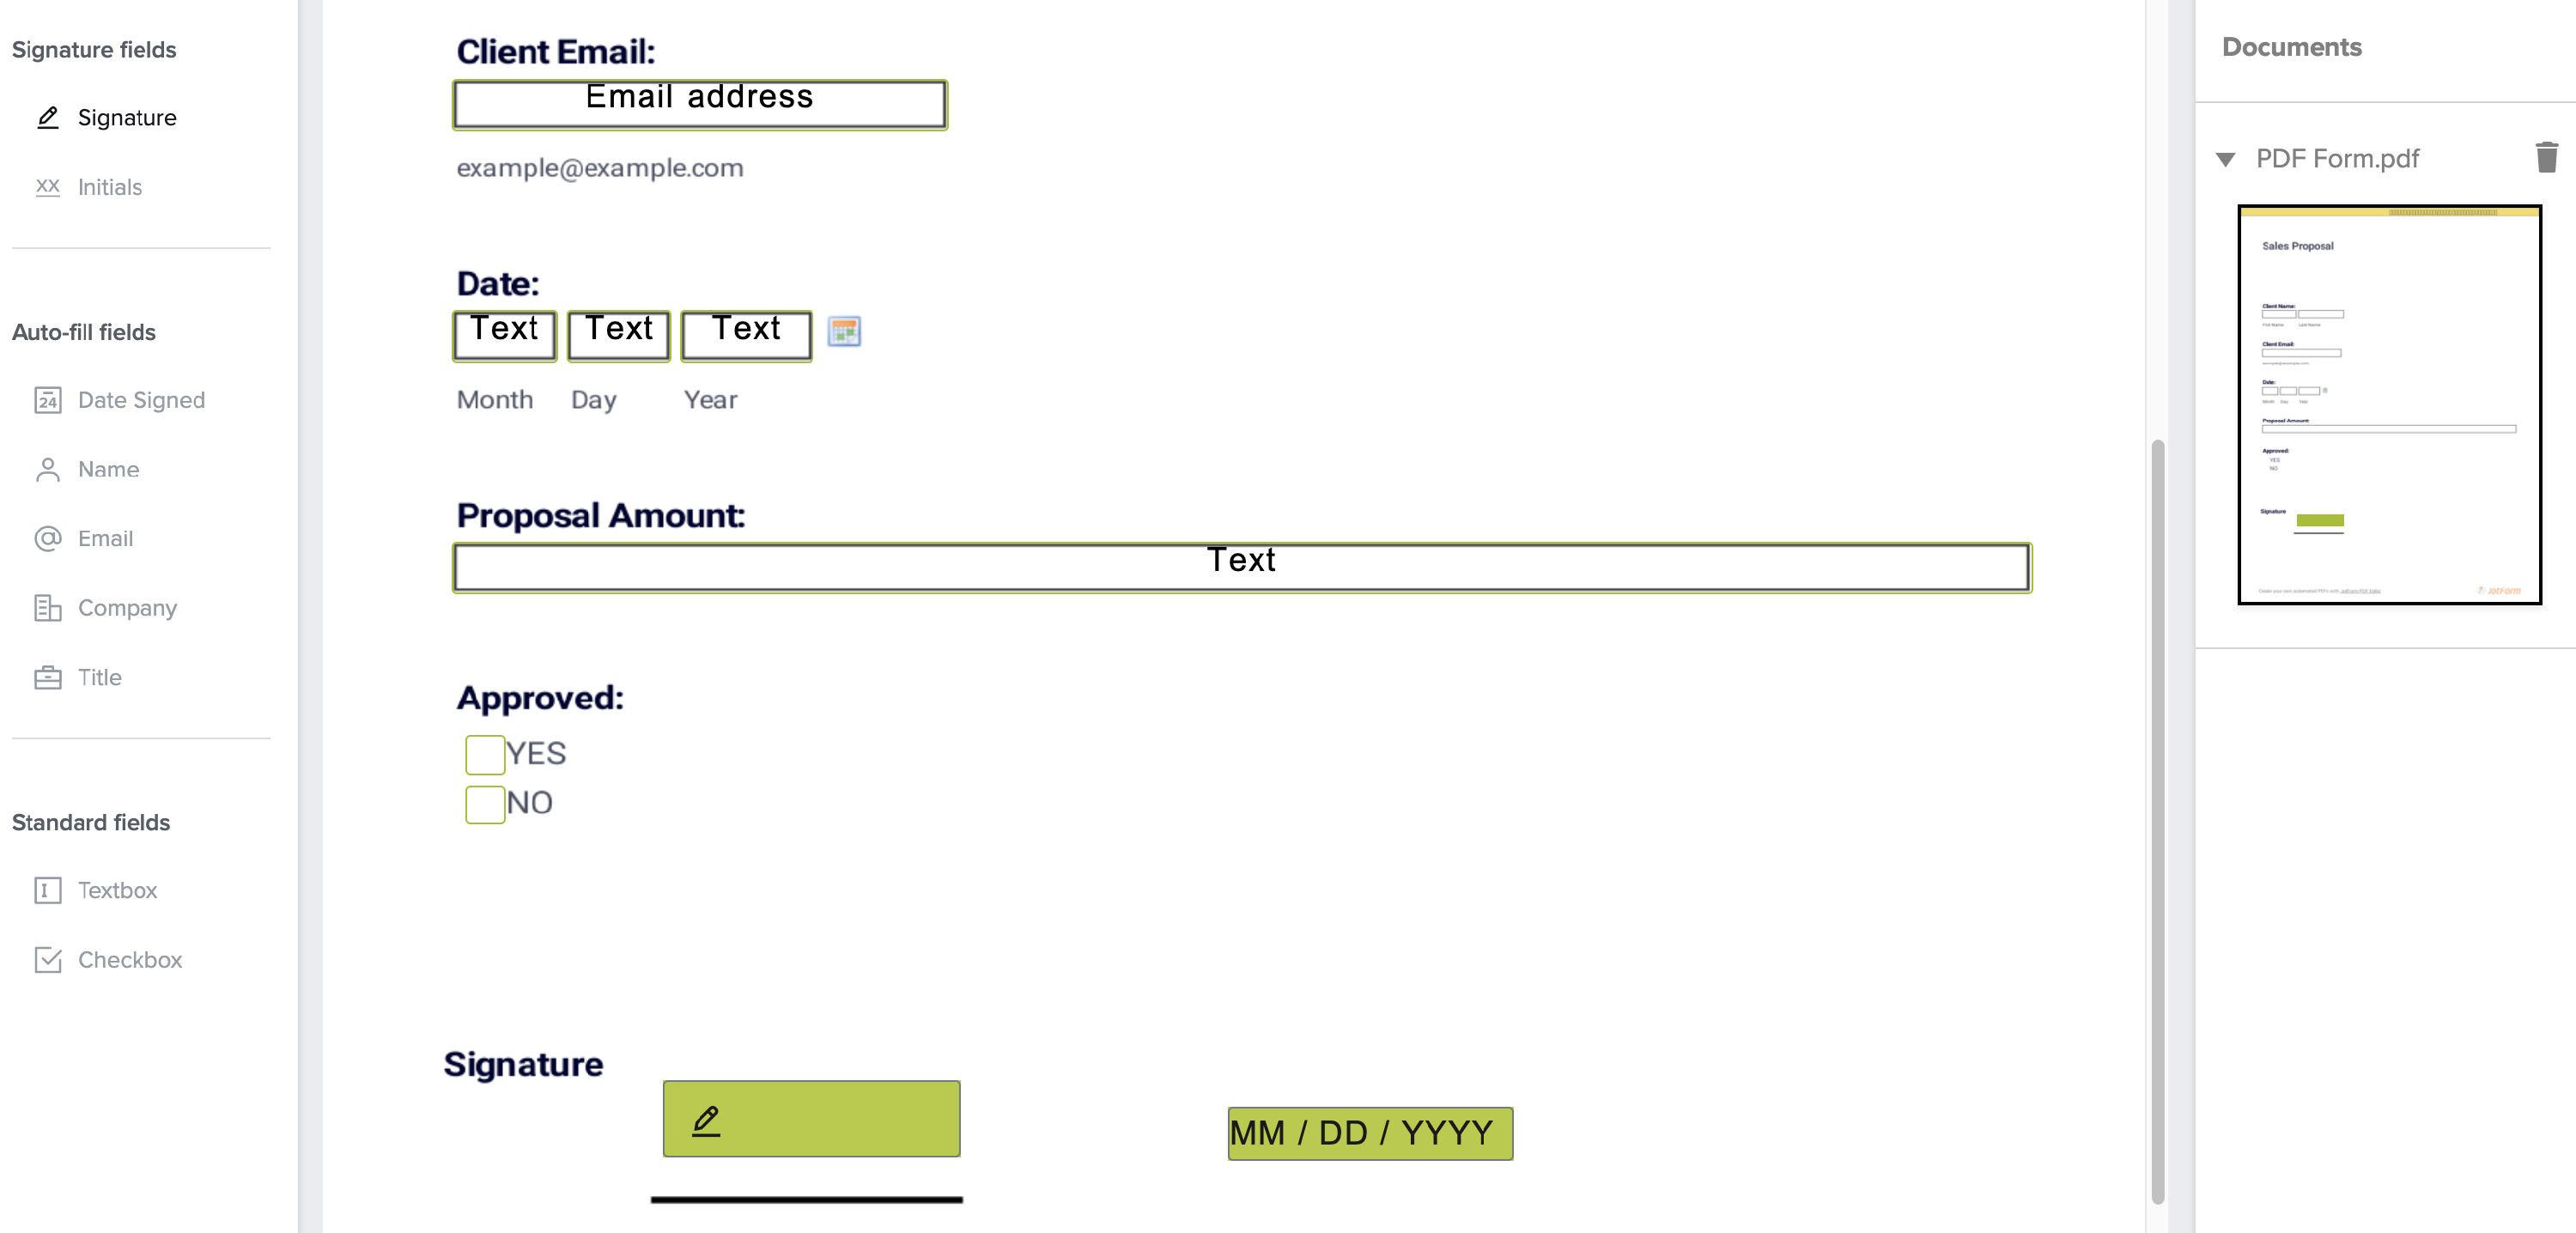
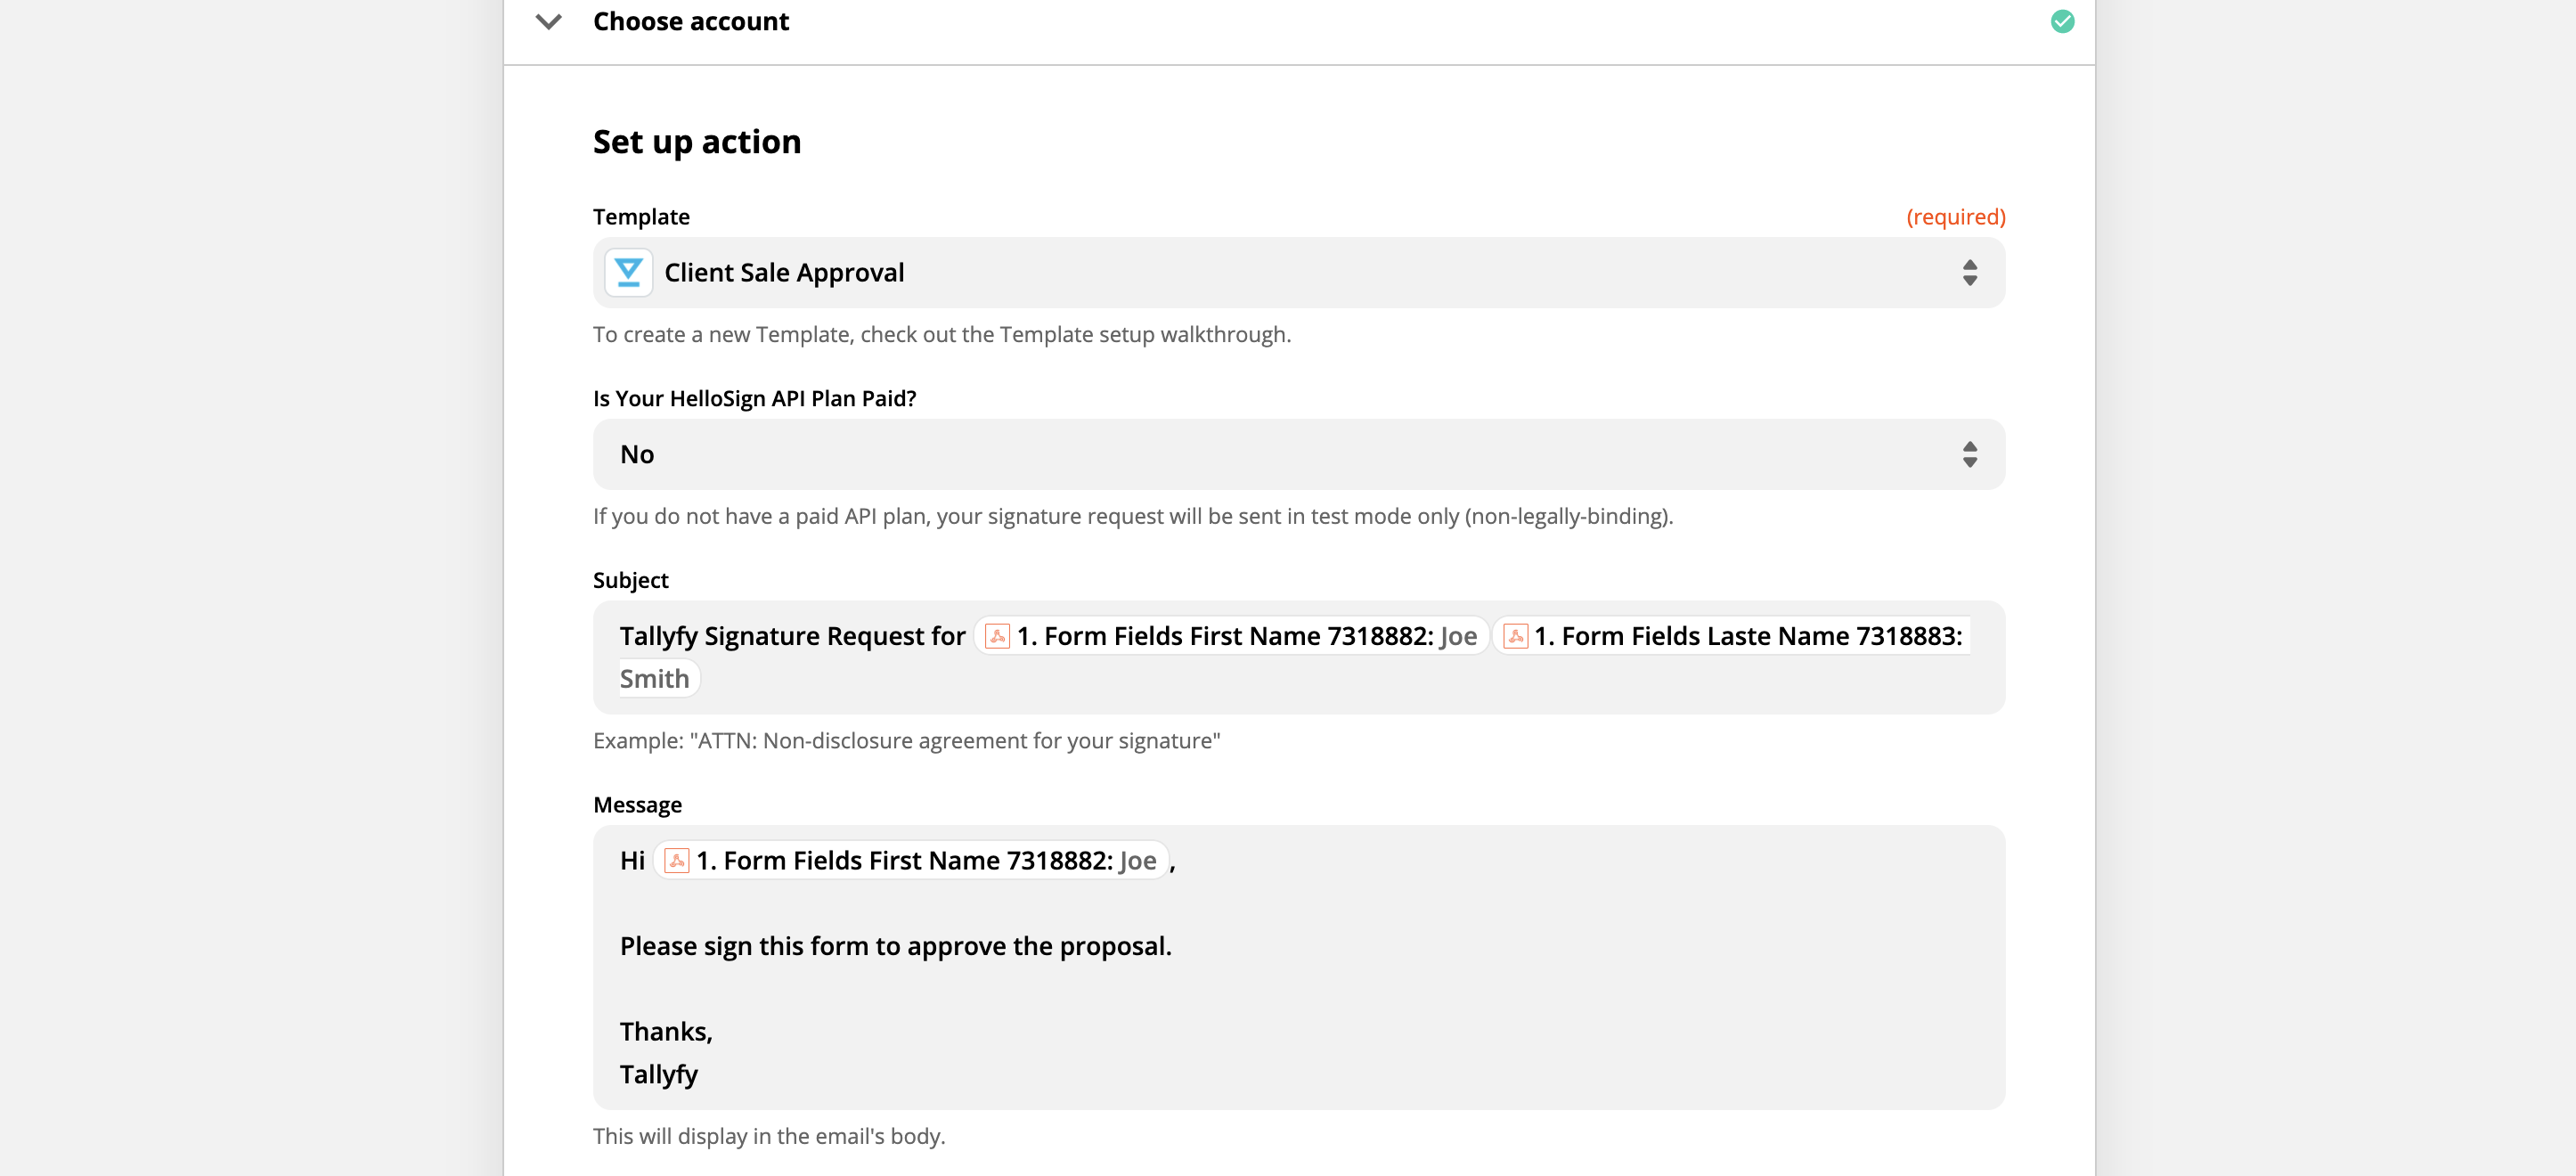
Connect Tallyfy to e-signature services like DocuSign or HelloSign through middleware tools. When someone completes a workflow step, documents automatically go out for signing. No manual work. Most teams save 15-20 minutes per document1.

What you’ll need

  • A Tallyfy account with webhook access
  • A middleware account (Zapier, Power Automate, or Make.com)
  • An e-signature service account (DocuSign or HelloSign)
  • A document template ready in your signature service

How it works

  1. Create a workflow in your middleware tool that receives data from Tallyfy.
  2. Set up a Tallyfy process with form fields to collect what your document needs - name, email, contract terms, etc.
  3. Add a webhook to the Tallyfy step that should trigger signing.
  4. Connect your e-signature service in the middleware tool.
  5. Test everything and activate the automation.

Document signing automation flow

Diagram

Key points:

  • Steps 2-3: The webhook fires2 when someone completes a Tallyfy step - no manual triggers needed
  • Step 4: Middleware handles field mapping - set it up once and it works every time
  • Steps 7-8: The optional return path means Tallyfy knows when documents get signed without you checking

Step 1: Create a webhook listener in your middleware

  1. Create a new workflow in your middleware tool (called a “Zap” in Zapier, “Flow” in Power Automate, or “Scenario” in Make.com).
  2. Choose “Webhooks” as the starting trigger.
  3. Select “Catch Hook” or “When a HTTP request is received” as the trigger event.
  4. Copy the unique URL your middleware gives you - Tallyfy sends data to this address. Zapier integration setup screen view view

Step 2: Set up your Tallyfy process

  1. Create or edit a template in Tallyfy.
  2. Add form fields to collect what your document needs - client name, email, contract details, etc.
  3. Pick the step where document signing should trigger. When someone completes this step, the signature request goes out automatically.
  4. Add the webhook URL from Step 1 to this step:
    • Click the settings icon for the step.
    • Go to the Outbound Webhooks section.
    • Paste the URL you copied from your middleware tool.
    • Choose which form field data to send. Webhook configuration panel with unique step alias field

Step 3: Connect your e-signature service in the middleware

For HelloSign

  1. Prepare your document template in HelloSign with all signature fields and data spots marked. Zapier integration setup screen view view
  2. In your middleware workflow, add a HelloSign action step after the webhook trigger.
  3. Choose “Send Signature Request From Template”.
  4. Select your HelloSign template.
  5. Map the Tallyfy fields to HelloSign fields - for example, Tallyfy’s ‘Client Name’ goes to HelloSign’s ‘Signer Name’. Zapier integration setup screen view view

For DocuSign

  1. Prepare your document template in DocuSign with signature and data fields marked. Zapier integration setup screen view view
  2. In your middleware workflow, add a DocuSign action step after the webhook trigger.
  3. Choose “Create Signature Request”.
  4. Select your DocuSign template.
  5. Map each Tallyfy field to the corresponding DocuSign field. Zapier integration setup screen view view

Step 4: Test and activate

  1. Test your middleware workflow to confirm everything connects.
  2. Launch a Tallyfy process with test data - use your own email to see it work.
  3. Complete the step that has the webhook attached.
  4. Check your email for the signature request.
  5. If it works, activate your middleware workflow. Look for “Publish”, “Turn On”, or “Activate” depending on your platform.

Tracking when the document is signed

You can set up a return path so Tallyfy knows when documents get signed:

  1. Create a second workflow in your middleware tool that triggers when your e-signature service reports “document signed.”
  2. Use the Tallyfy API to find the right task and mark it complete.
  3. You’ll need three IDs from Tallyfy:
    • Your Organization ID (found in Tallyfy settings).
    • The Process ID for the launched process instance.
    • The Task ID for the task to mark complete.

The end result:

  1. Someone completes a Tallyfy step - document goes out for signing.
  2. Recipient signs the document.
  3. Tallyfy updates to show the signing task is done.

Documents > Generate documents

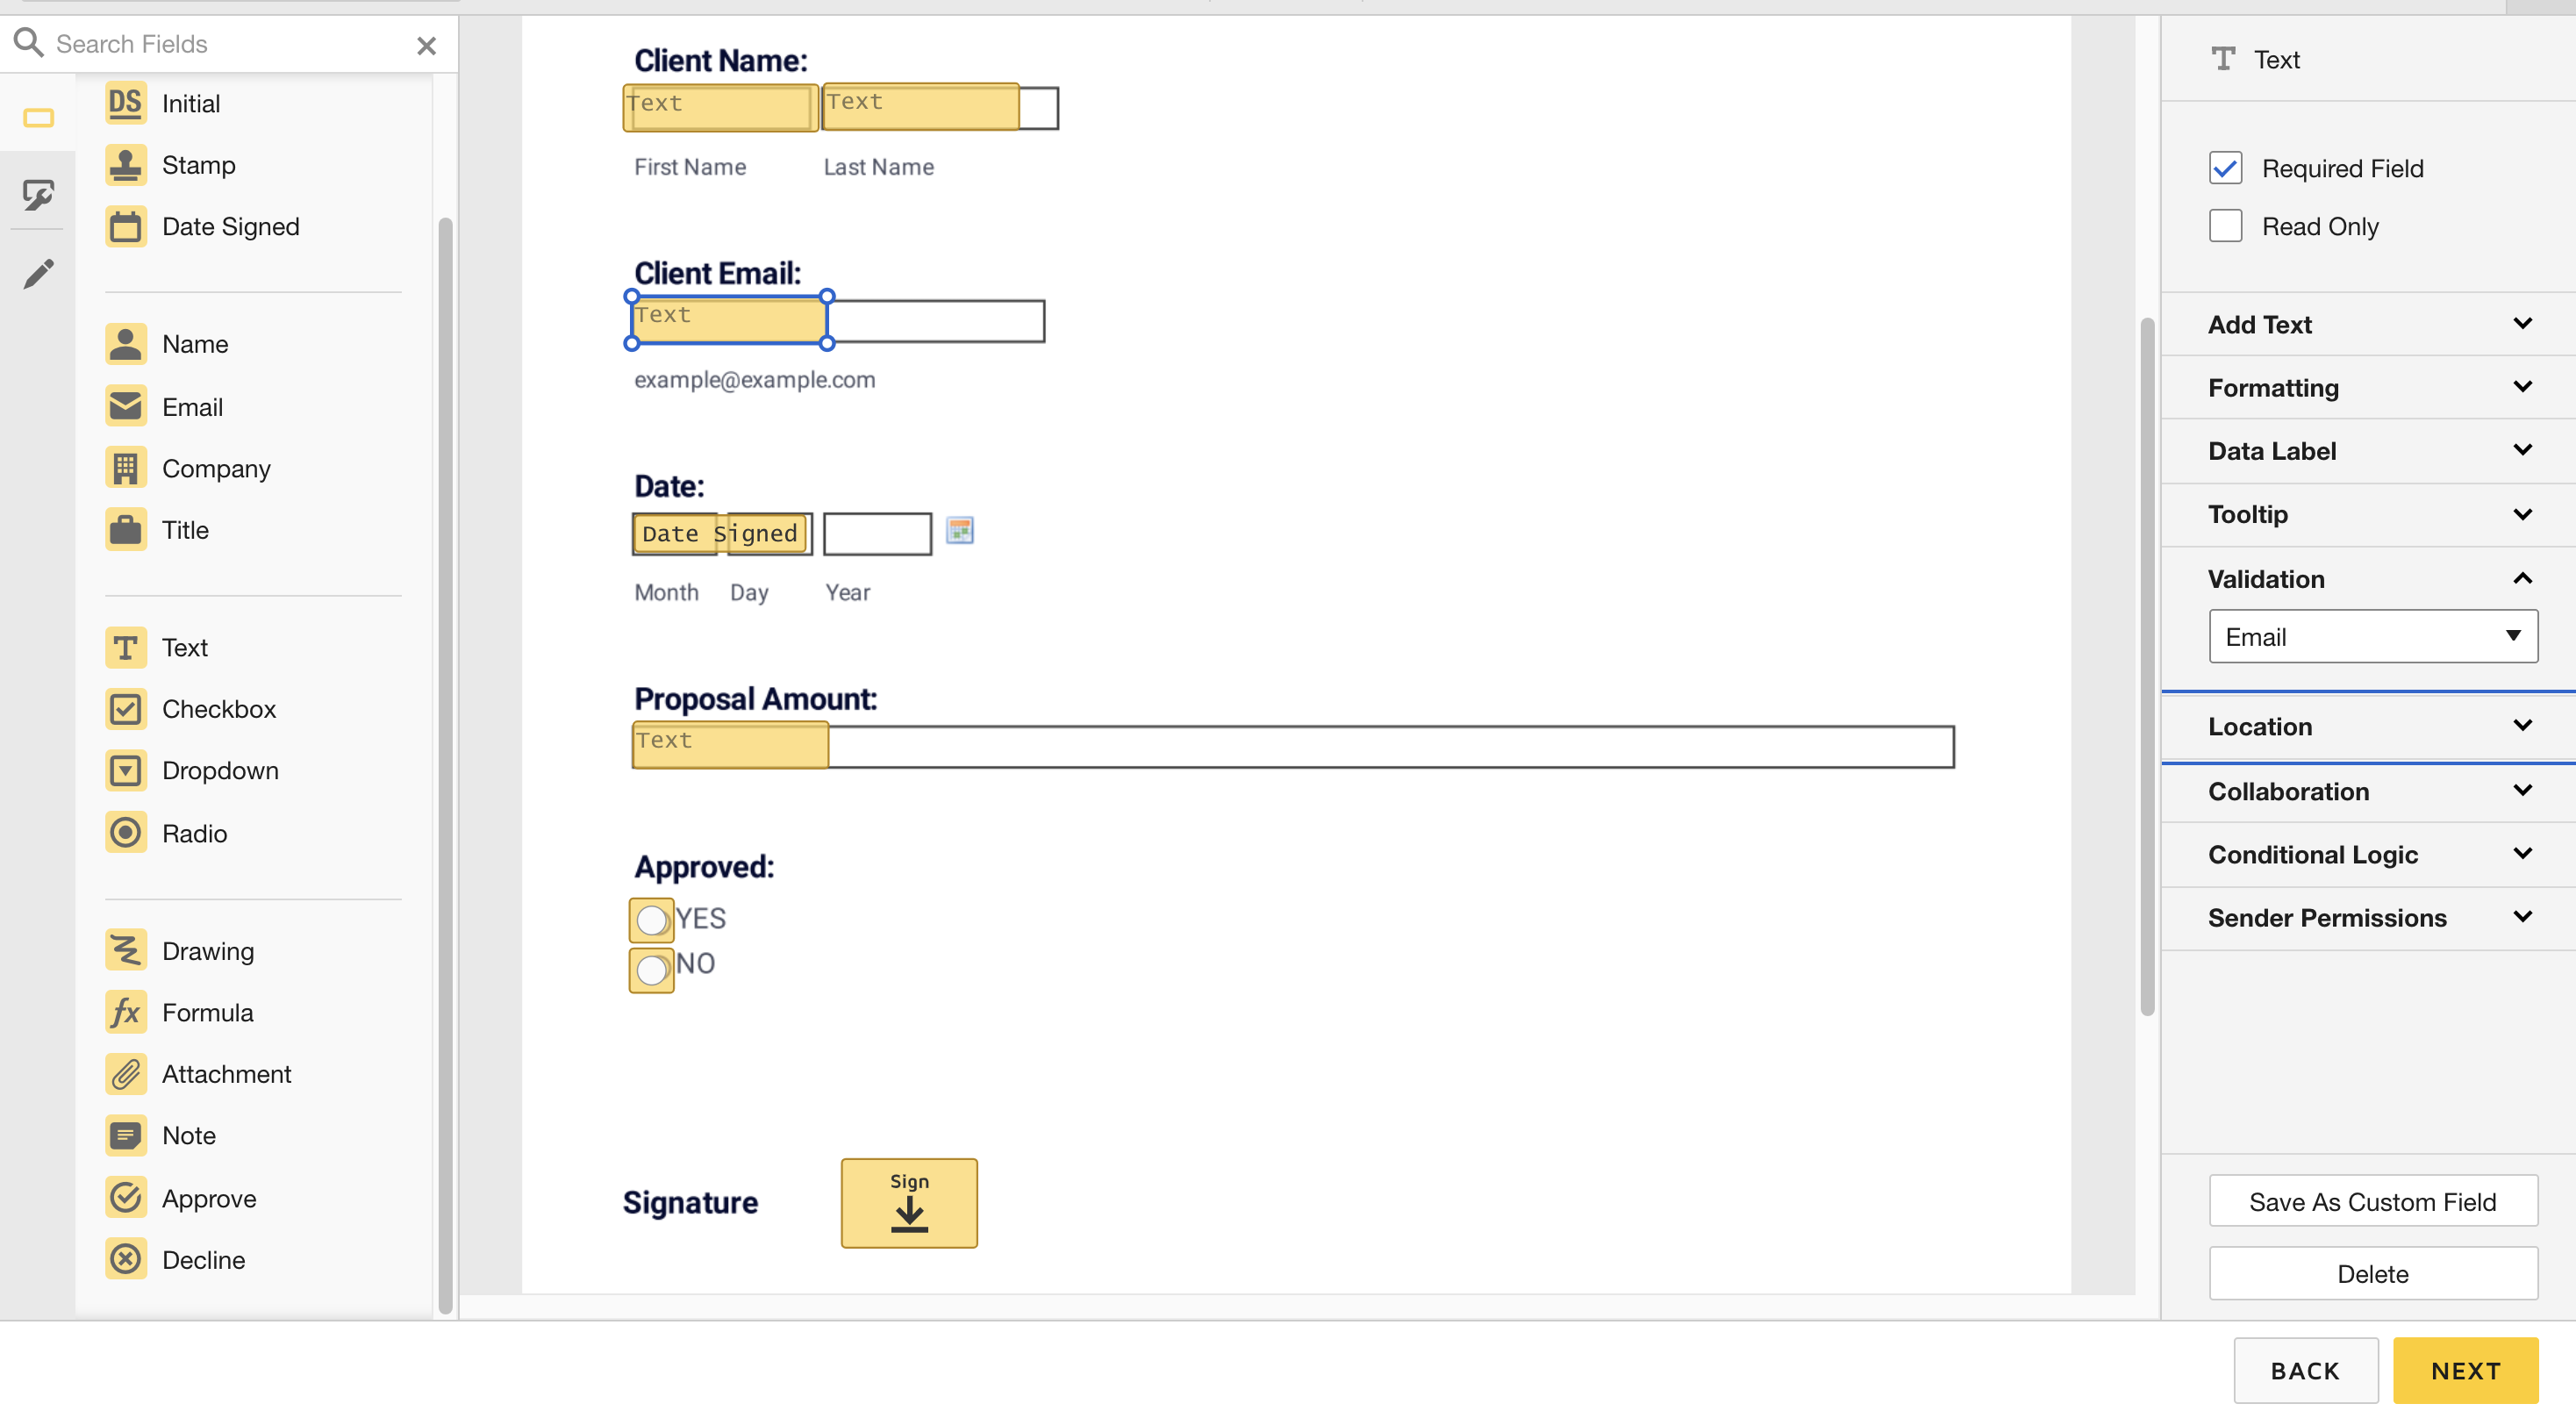
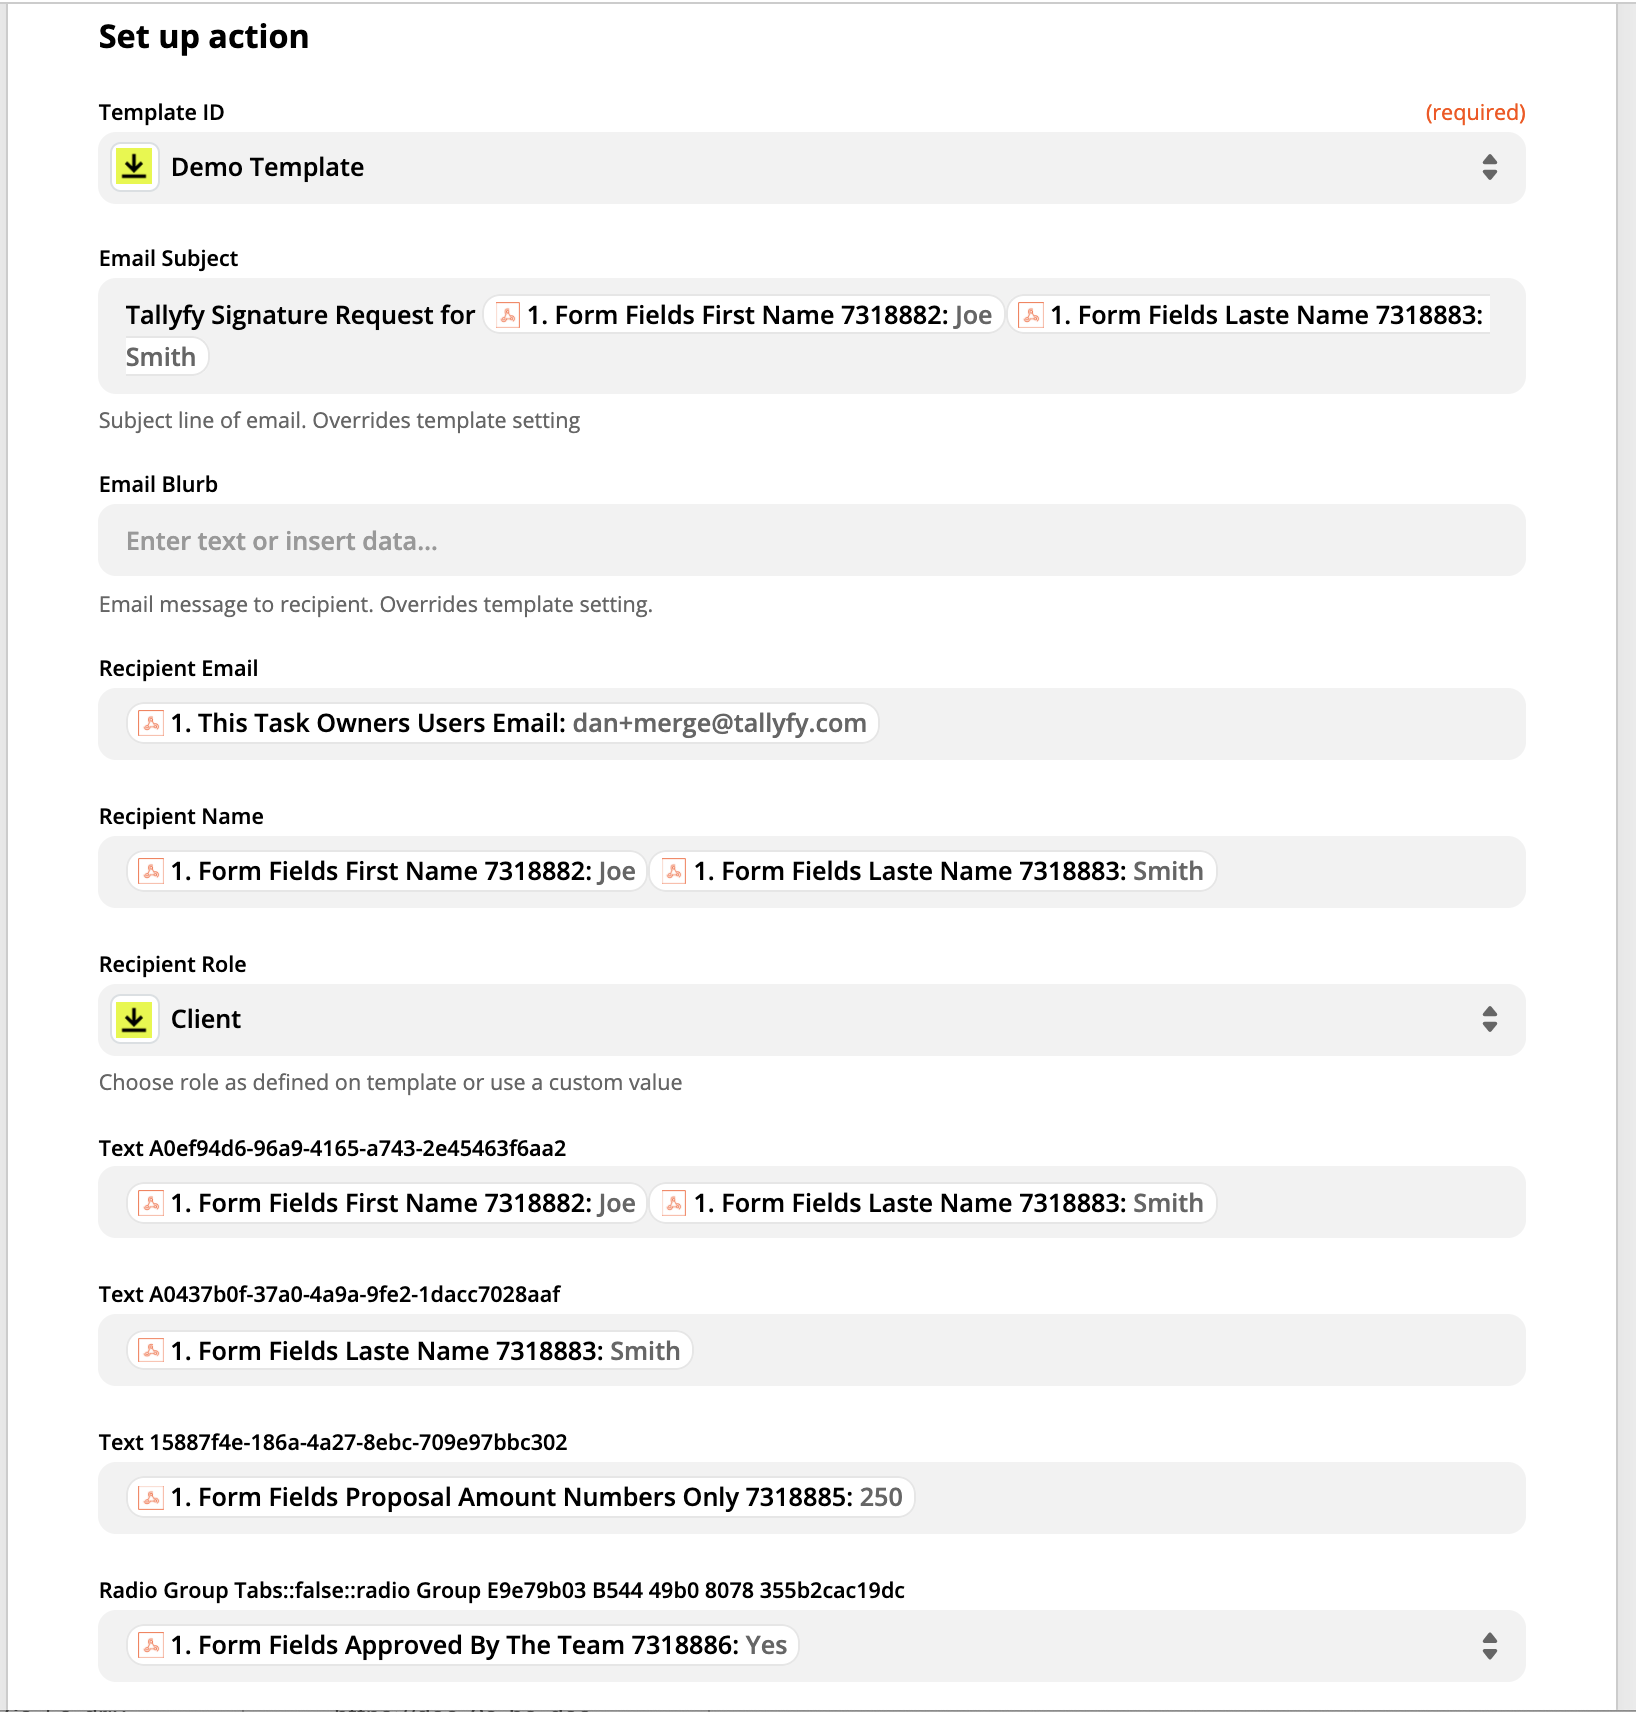
Tallyfy can automatically generate documents like contracts and PDFs by connecting form field data from completed tasks through middleware to document creation services like WebMerge or DocuSign in a setup that takes about 15 minutes and eliminates manual data copying entirely.

Webhooks > Send emails using webhooks

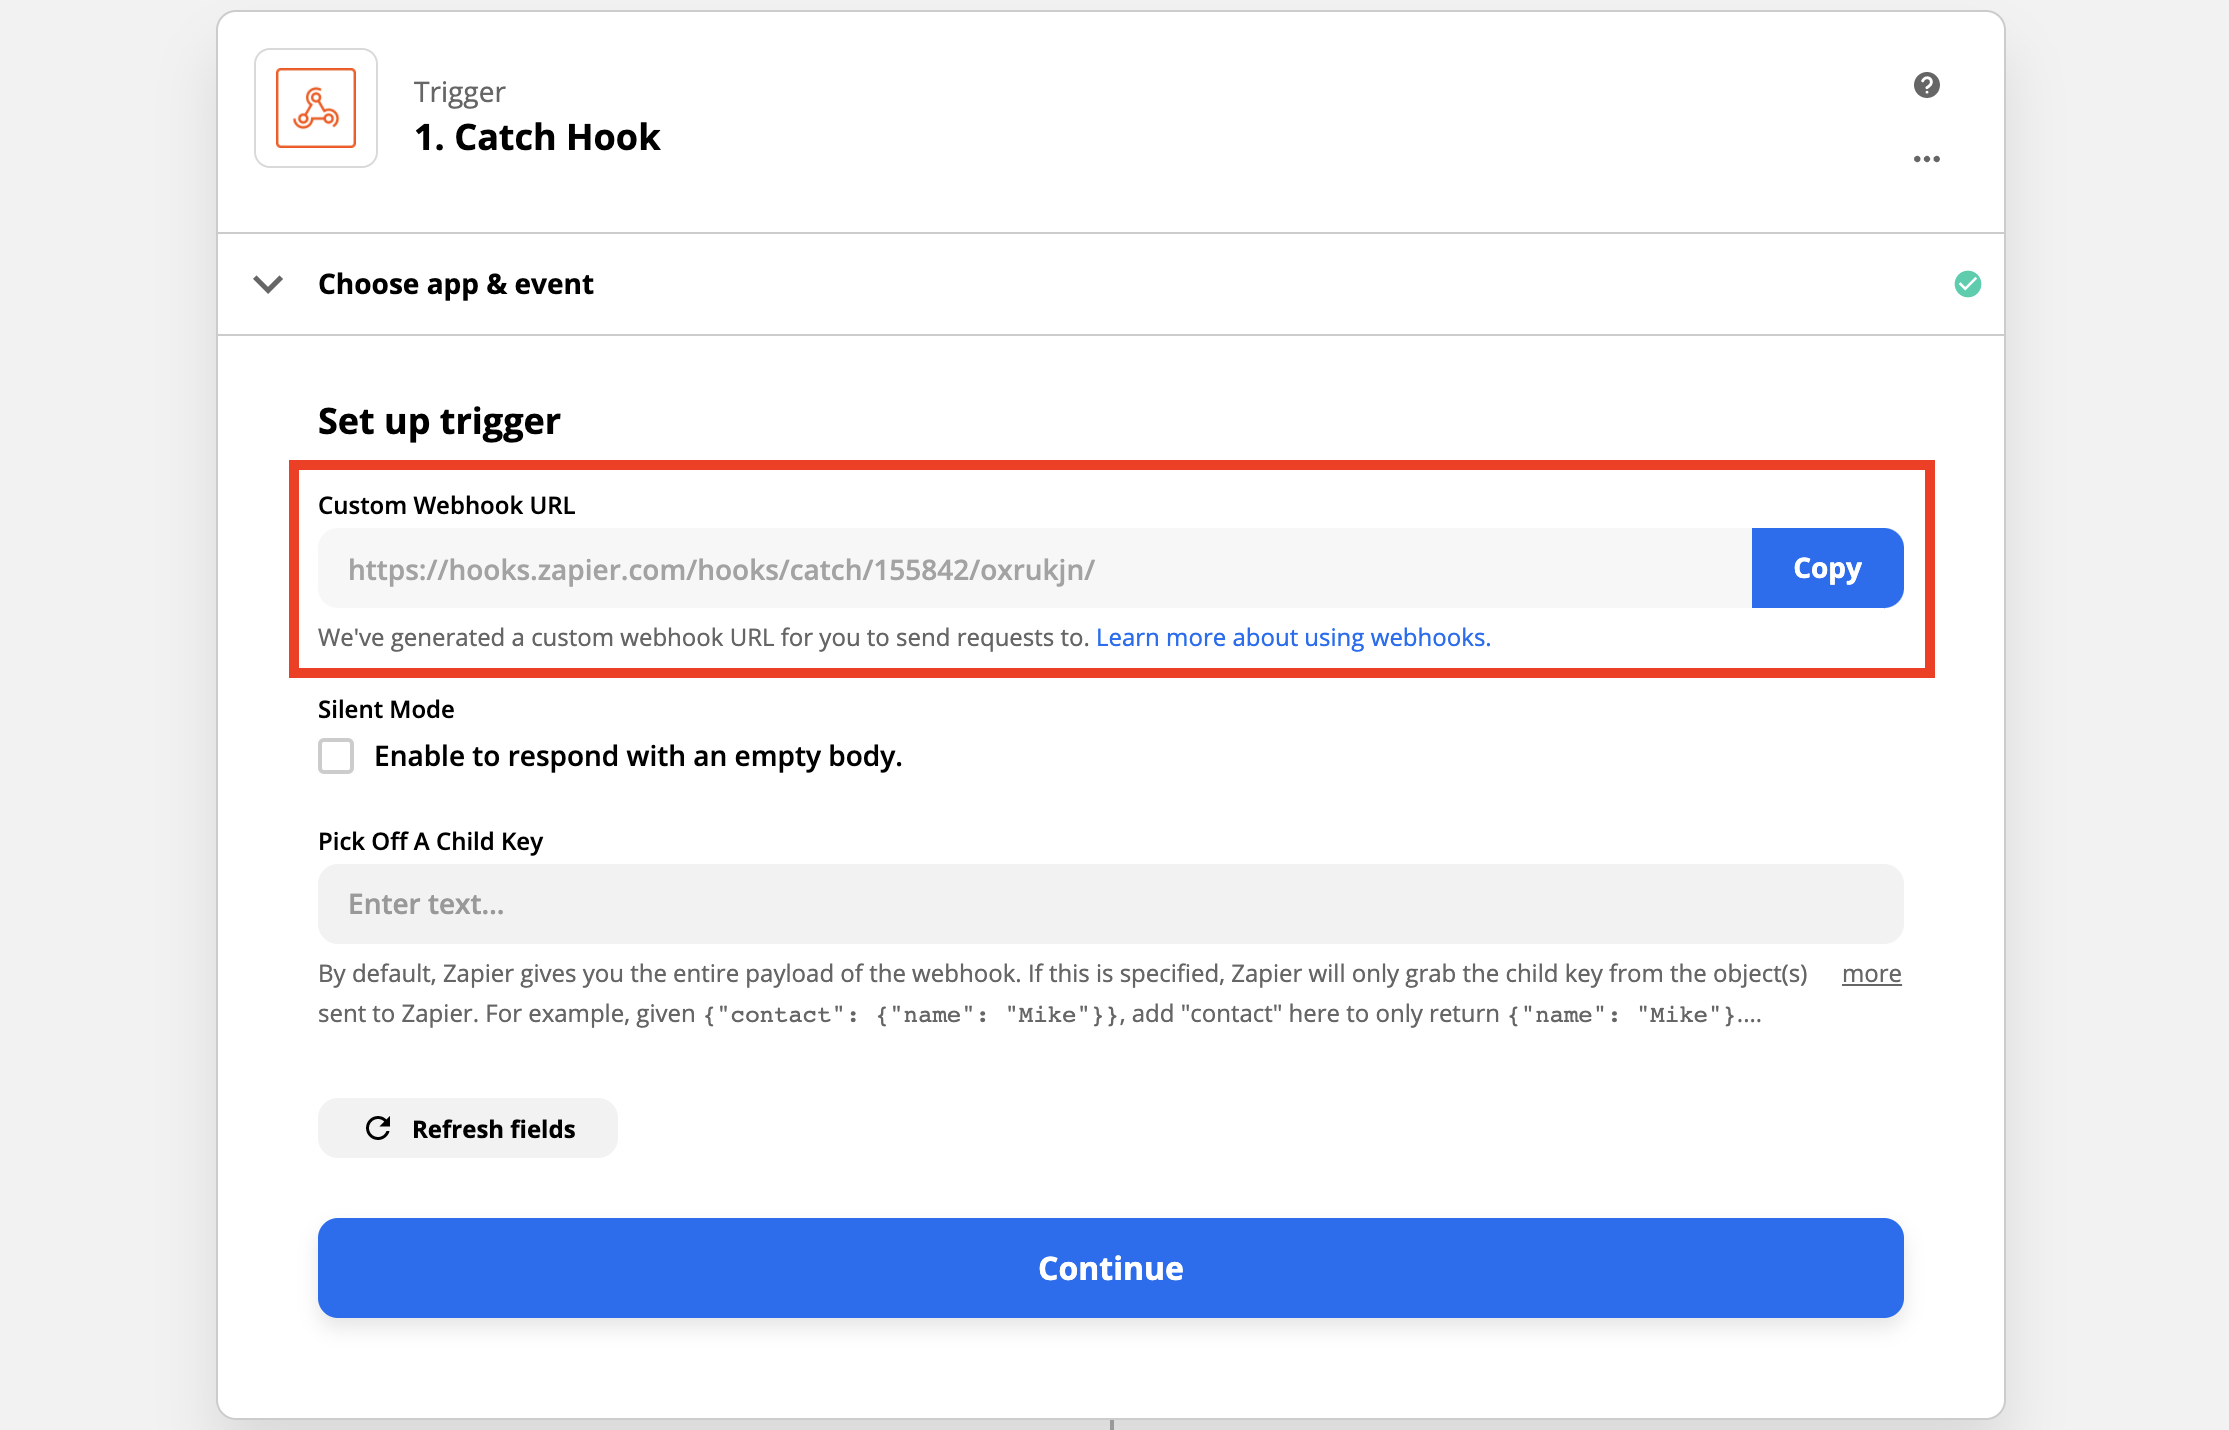
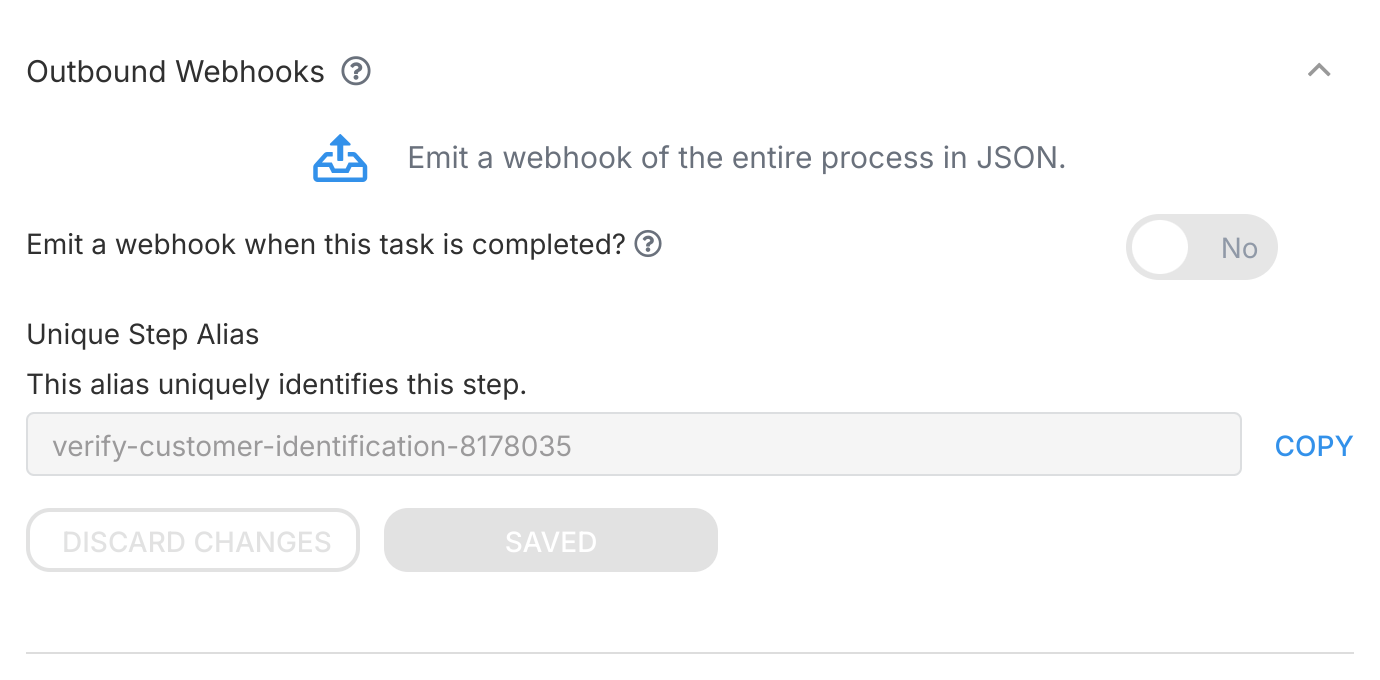
Tallyfy webhooks can be connected to middleware tools like Zapier or Make to automatically send custom emails with full process context whenever specific workflow events like task completions occur.

Middleware > Integrate to your CRM or ERP

Tallyfy integrates with CRM and ERP systems like Salesforce and NetSuite through middleware or magic links to automate the dozens of invisible micro-tasks between pipeline stages—such as technical reviews and legal approvals and team handoffs—that CRMs simply cannot track or coordinate across departments and external partners.

Middleware > Zapier

Tallyfy’s Zapier integration lets you automatically launch processes and complete tasks and sync form data across thousands of business apps without coding by creating trigger-action workflows called Zaps that connect Tallyfy to tools like CRMs and HR systems and helpdesks.

Footnotes

  1. Based on eliminating manual downloading, uploading, and tracking steps in traditional signing workflows

  2. Typically processes within 1-2 seconds of task completion, depending on network latency